
28 College Cork Board Ideas to Boost Campus Style Fast
A bare dorm wall can make a brand new room feel like a waiting room. One cork board changes that fast. These college cork board ideas help you turn a blank corner into a space that feels like yours, even on a tiny budget.
I’ve noticed that most students skip wall decor because it seems expensive or against the rules. It usually is neither. In this article, you will find 28 simple setups for photos, planners, study zones and cozy corners. Many use removable strips, cheap supplies and ten minutes of effort.
In my experience, the best boards do two jobs at once: they keep you organized and make your room feel like home. Scroll through, save your favorites and pick one to try this weekend.
Photo Grid Wall
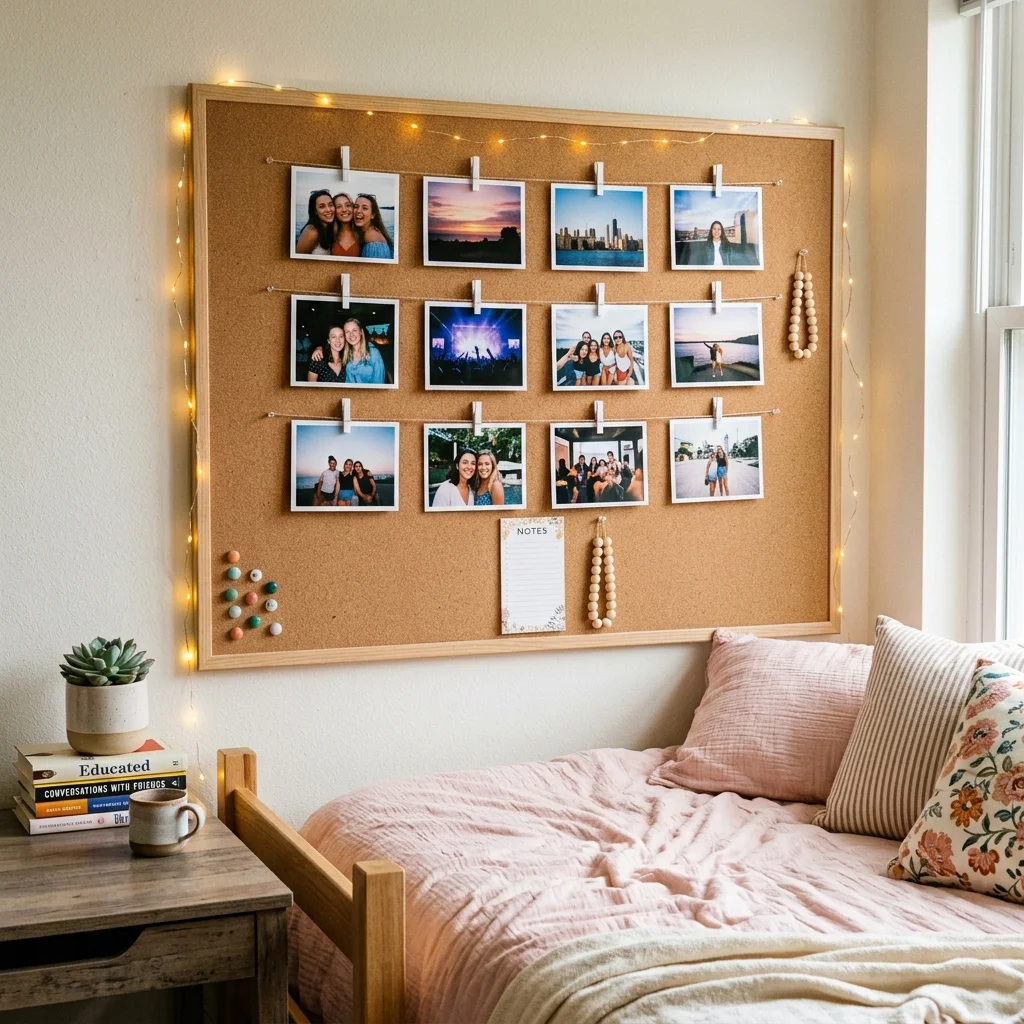
A blank dorm wall can make a new room feel temporary. A photo grid fixes that fast. Cut a paper template first, then pin twelve prints in three rows of four with equal gaps. These college cork board ideas work best when the spacing stays even, because tidy rows look planned.
In my experience, a ruler and a pencil save you from crooked rows. Mark light dots on the cork, then pin straight on top. Mix selfies, pets and friends so the grid feels personal. Swap two photos each month to keep it fresh.
Color Coded Calendar
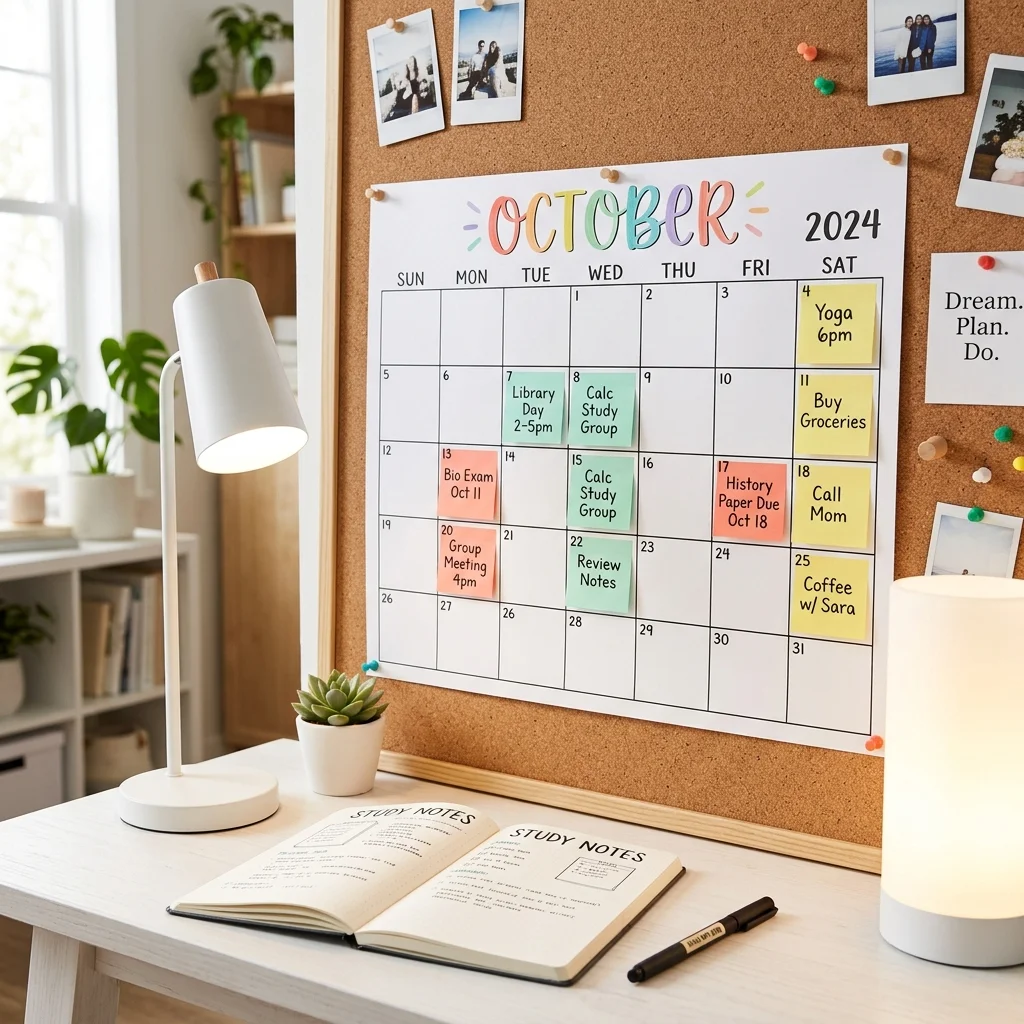
- Deadlines sneak up fast, so give each class its own color. Coral for biology, mint for English and yellow for everything else works well.
- Pin a printed monthly calendar in the center of the board. Keep it at eye level so you see it every day.
- Write exam dates on a red note and pin it above the current week. Red grabs your attention right away.
- Move finished notes to a small “done” corner. That tiny win feels good.
- Hang a sticky note pad on a string beside the board for quick reminders.
Students who see their week at a glance tend to stress less before midterms. A glance replaces the panic search through apps, emails and group chats. Spend ten minutes every Sunday night updating the notes and the board becomes a habit instead of just decoration.
Washi Tape Frame
Quick Tip:
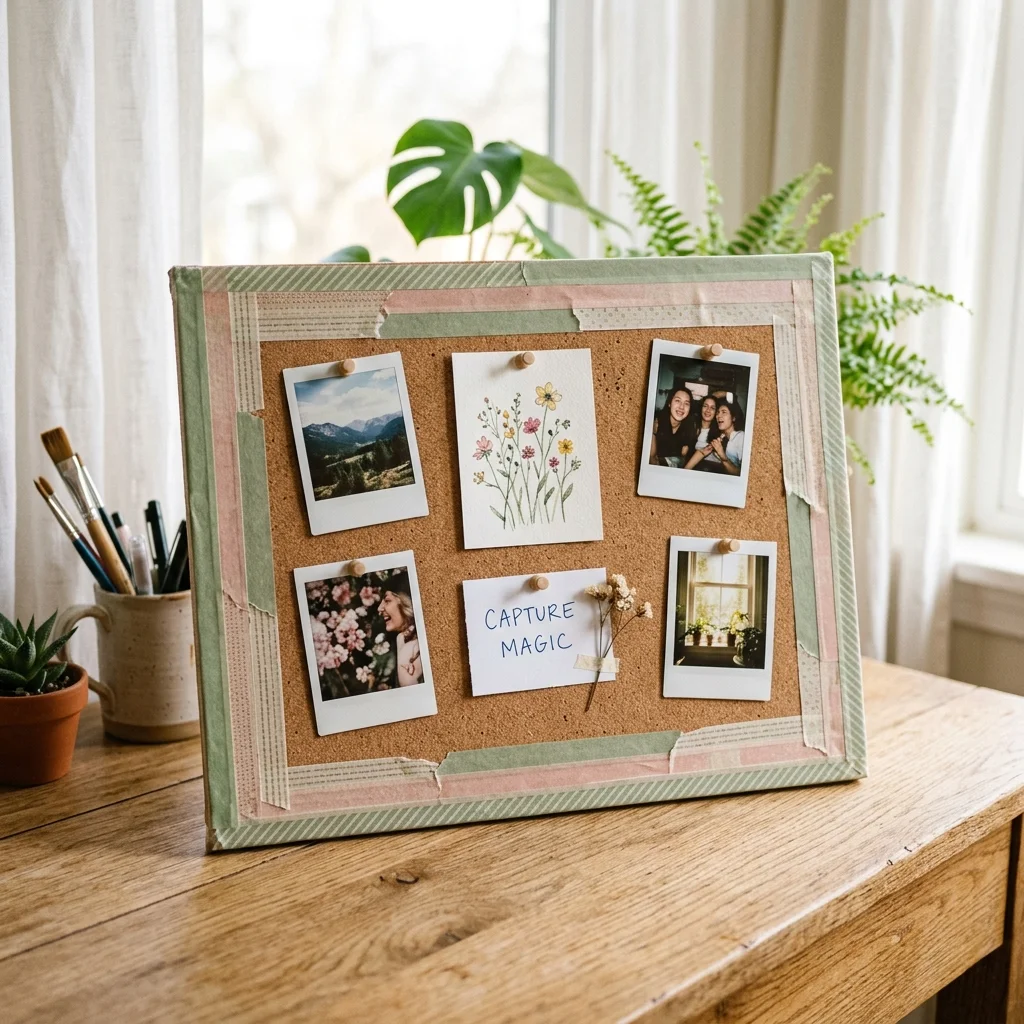
Press the tape along the board’s edge in one slow pull, then smooth it flat with your thumb. Cut the corners at a 45 degree angle for a clean fold. Washi tape peels off easily, so you can redo the frame anytime.
Plain cork can look like a school hallway. Washi tape fixes that for just a few dollars. Pick two or three shades that match your bedding or desk accessories so the board looks like part of the room. Reapply in a new pattern whenever you get bored.
Mood Board Collage
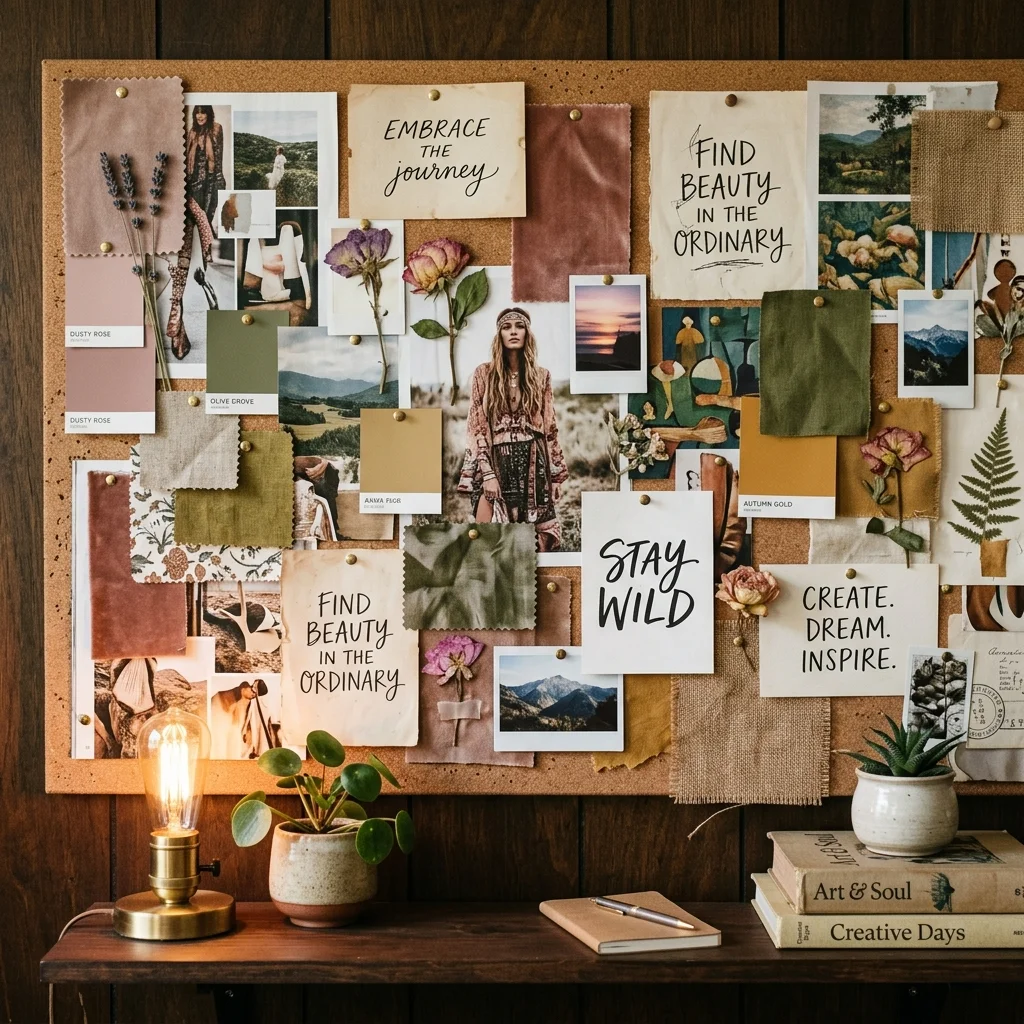
BEFORE: Scattered inspiration never turns into a finished room. Your ideas sit in saved posts, notebook pages and screenshots. Nothing connects.
AFTER: One board holds your palette, goals and favorite images side by side. You can spot what works together at a glance. Decisions about decor suddenly feel easy.
Start with five items only: a color chip, a fabric scrap, a quote, a photo and a magazine cut. Overlap edges slightly for depth. Then add more as you find them. A finished board also stops costly impulse buys that clash with your color palette.
Study Zone Setup
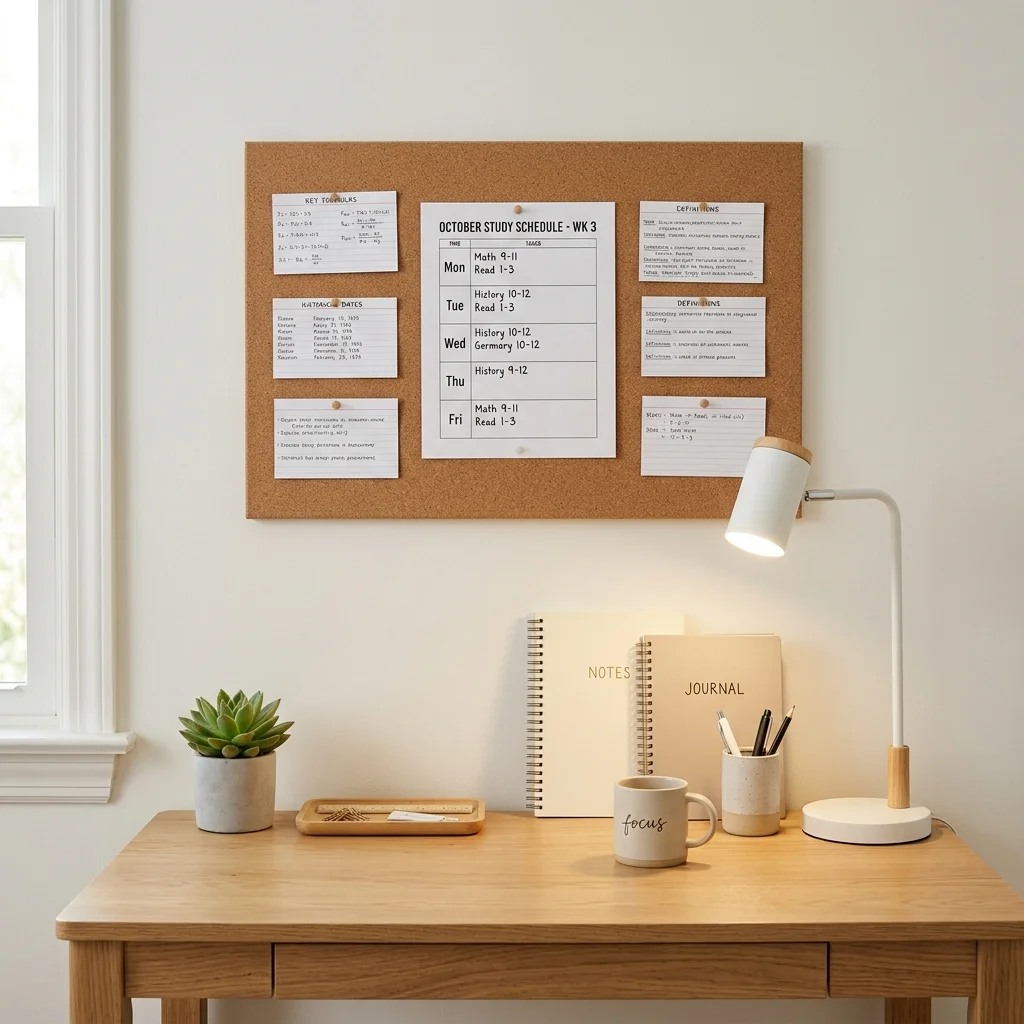
- Hang the board at eye level when you sit, about 12 inches above the desk surface.
- Pin your class schedule in the top left corner, where your eyes land first.
- Add index cards with key formulas or vocabulary in the middle.
- Keep the bottom row for urgent tasks only and mark them with one bright pushpin.
Distraction loves a messy view. A focused board gives your eyes one place to land between study sessions. Fewer items work better than more, so cap the board at ten pieces. When something new arrives, remove something old. Finals week gets much calmer that way.
Framed Cork Panels

| Point | Plain Tile | Framed Panel |
|---|---|---|
| Look | Raw and basic | Finished and polished |
| Price | Very low | Moderate |
| Durability | Edges chip over time | Edges stay protected |
| Best for | Temporary dorms | Apartments and long stays |
Corners crumble on cheap tiles after a semester of pushing pins. A frame keeps edges intact and makes the board look intentional. If your budget is tight, buy plain tiles and glue thin wood trim around them. The finished result costs less than a lunch.
Fabric Covered Board

Do:
- Iron the fabric flat before you start.
- Pull it tight and staple it to the back of the board.
- Choose a light or medium solid color so photos stand out.
- Stretch ribbon tight across the front for a criss cross layout.
Don’t:
- Don’t use heavy patterns that hide your photos.
- Don’t staple through the front of the cork.
- Don’t pick thin fabric that shows the cork dots through.
- Don’t glue the fabric down if you may want to change it later.
Plain cork looks flat next to soft bedding. Fabric brings in texture and color and it hides the usual cork dots. In my experience, linen and cotton canvas hold up best because they stay tight after months of pinning. Match the shade to a pillow or blanket.
Mini Tile Cluster
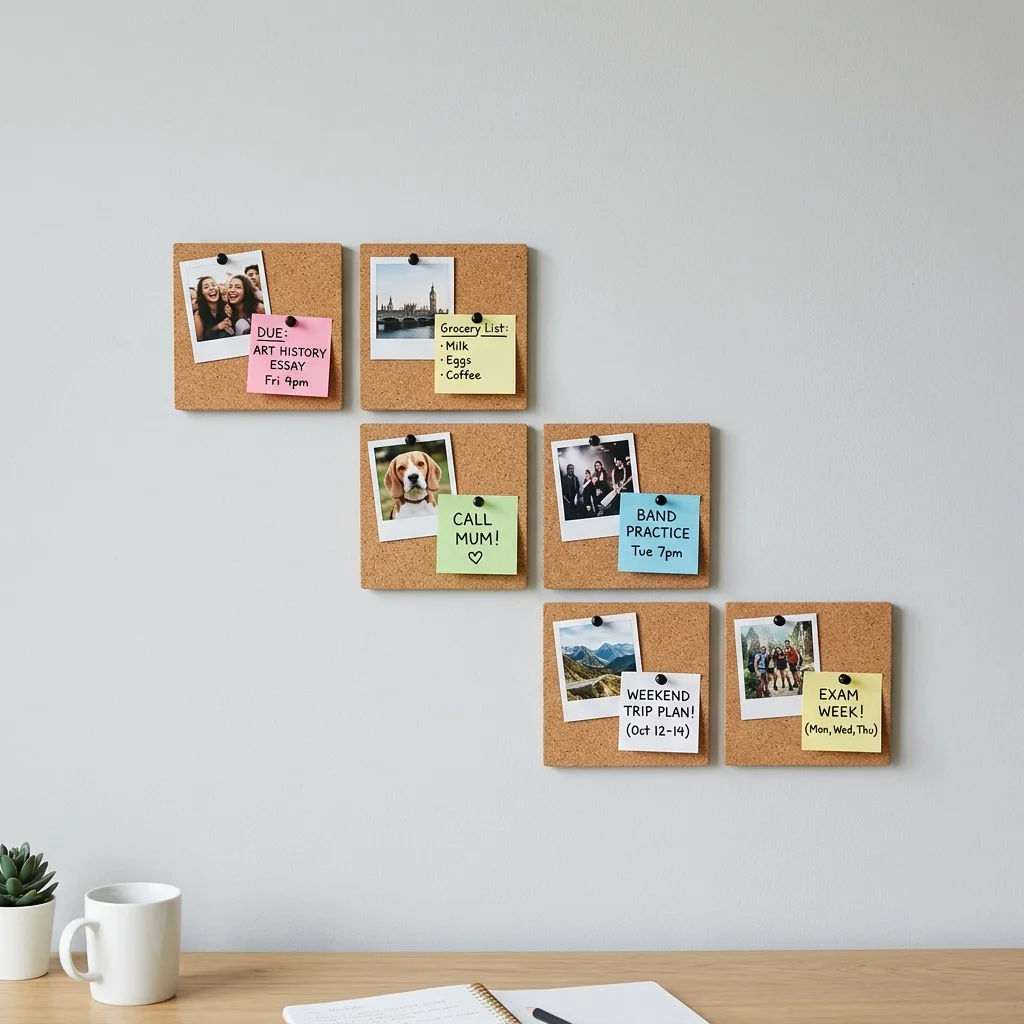
Cost: Low | Time: 30 minutes | Skill Level: Beginner
Best For: Small dorm walls and renters
Works In: Dorms, shared apartments, desk corners
Result: A modular display you can rearrange anytime
Small tiles solve the big board problem. They fit narrow gaps beside windows, over desks or near the closet. Use removable adhesive strips so your deposit stays safe. Leave about two inches between tiles and you get a clean, intentional pattern that grows as you collect memories.
Polaroid Memory Strip
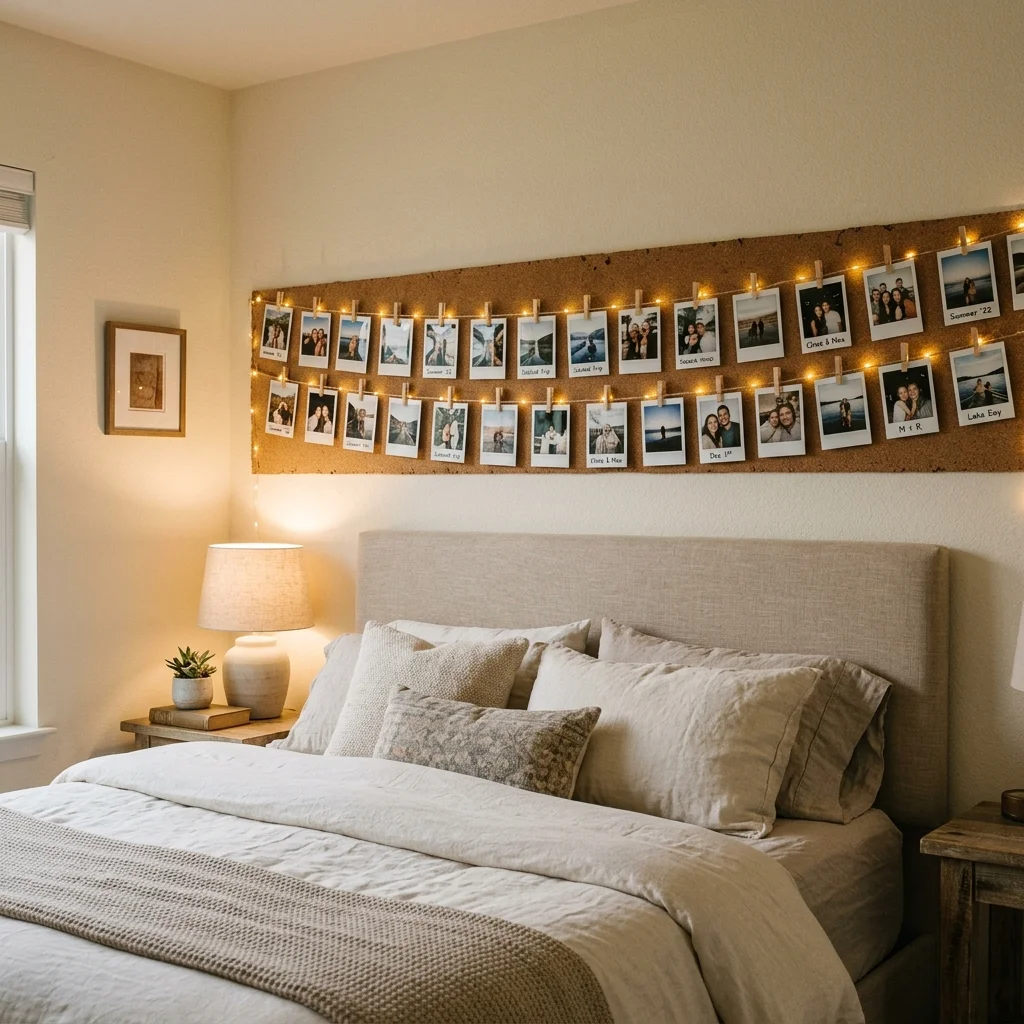
Homesickness hits hardest at night. A single strip of instant photos above your bed keeps familiar faces within sight. Cut a slim cork roll to the width of your headboard and mount it with removable strips. Clip each photo in a relaxed row.
Keep the photos at the same height so the row feels calm. Rotate three new prints every semester and store old ones in a shoebox. Add a small paper tag with a date under each photo if you like. It turns a wall into a timeline of your year.
Dorm Door Board
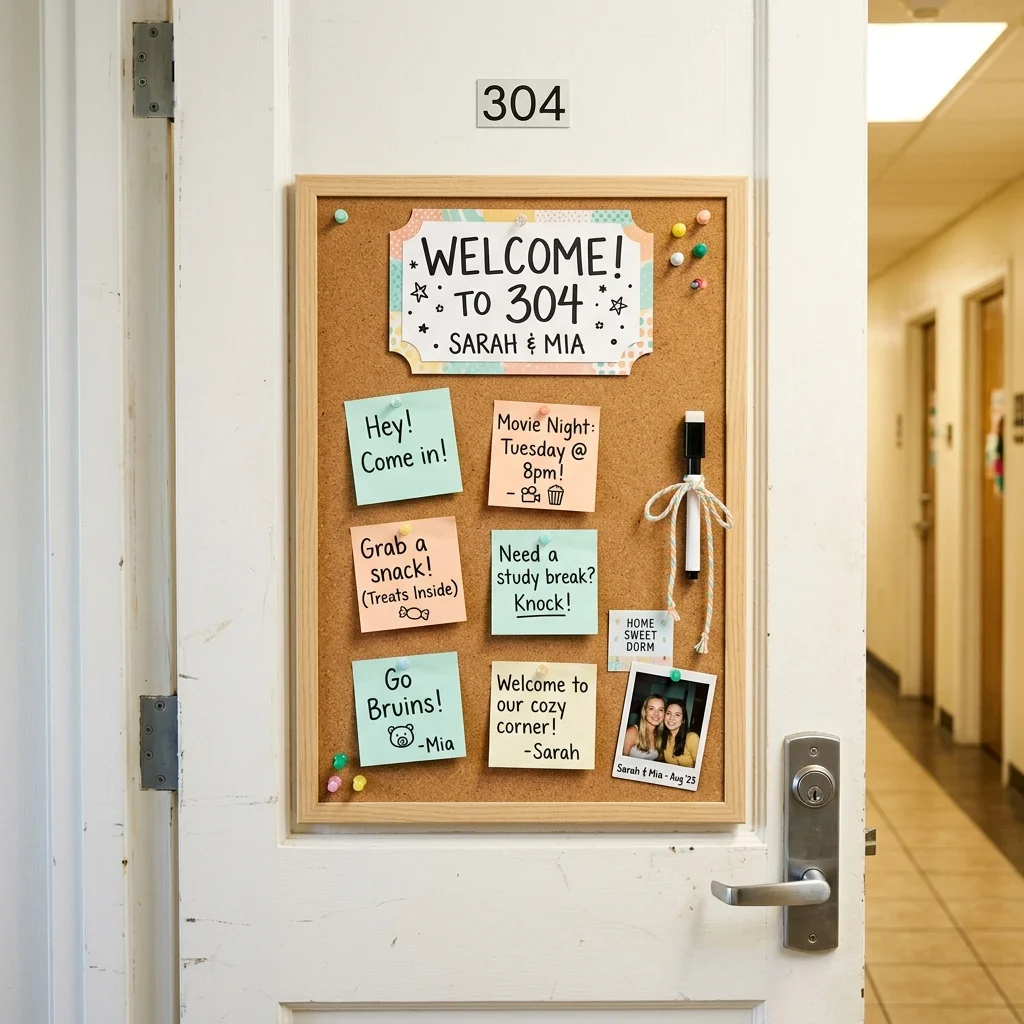
- Your door is the first thing visitors see, so treat it like a mini welcome sign. Write your name in large letters at the top.
- Hang a small marker on a string so friends can leave messages. Check it daily, since it replaces a lot of texts.
- Pin a small card with your nickname and one fun fact for new neighbors.
- Add one funny photo or sticker to show your personality.
- Use removable hooks or strips, since many dorms ban nails.
Hallway boards start conversations. I’ve noticed that one funny note on a door can turn a neighbor into a friend. Keep the content light and friendly and never post private details like your full schedule or phone number. A door board should welcome people without oversharing.
Fairy Light Frame
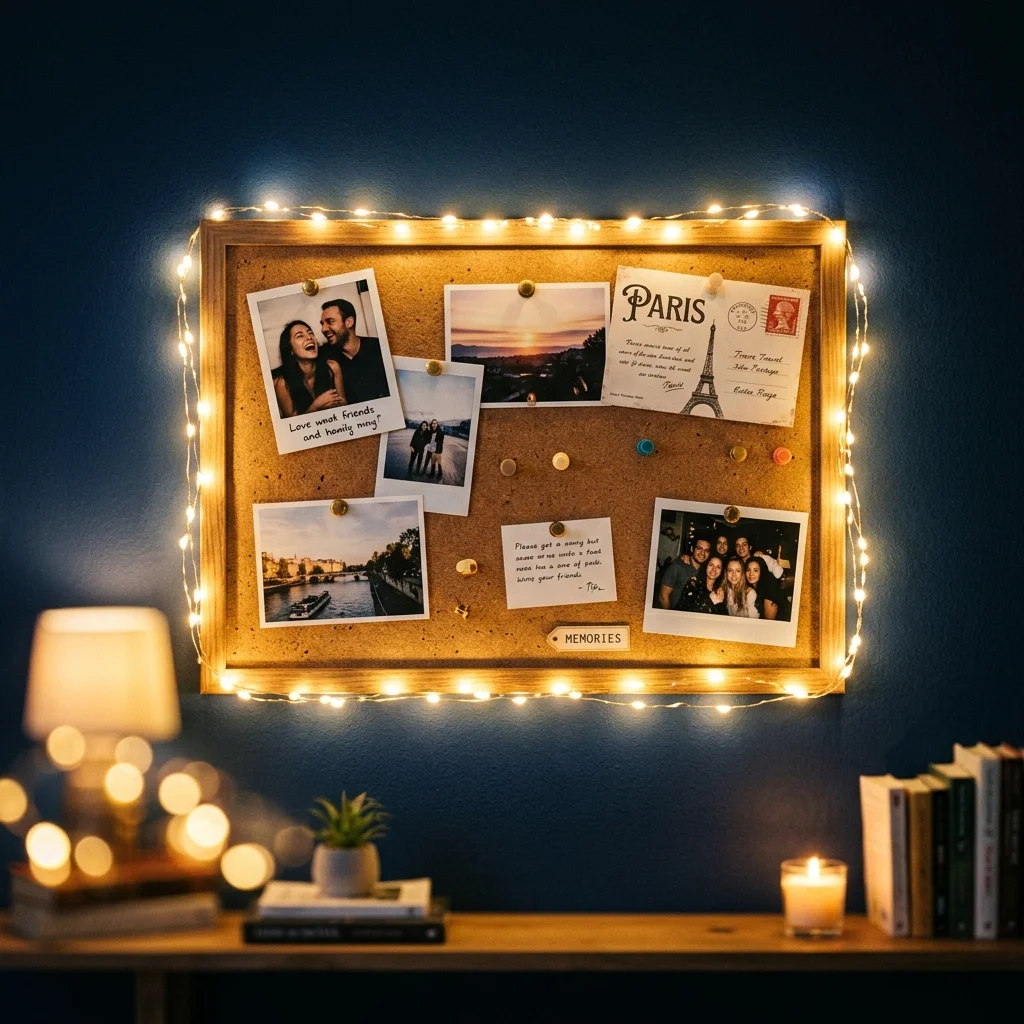
Quick Tip:
Choose battery powered LED lights, never plug in strings that run hot near paper. Tape the cord flat along the board edge with small clear clips. Put the battery pack behind the board so it stays hidden.
Soft light turns an ordinary board into a nightlight. Evening study sessions feel calmer under a warm glow. Keep photos away from the bulbs so nothing sits on a hot spot and switch the lights off when you leave the room. Cool LED strings are the safest pick for dorms.
Desk Organizer Board
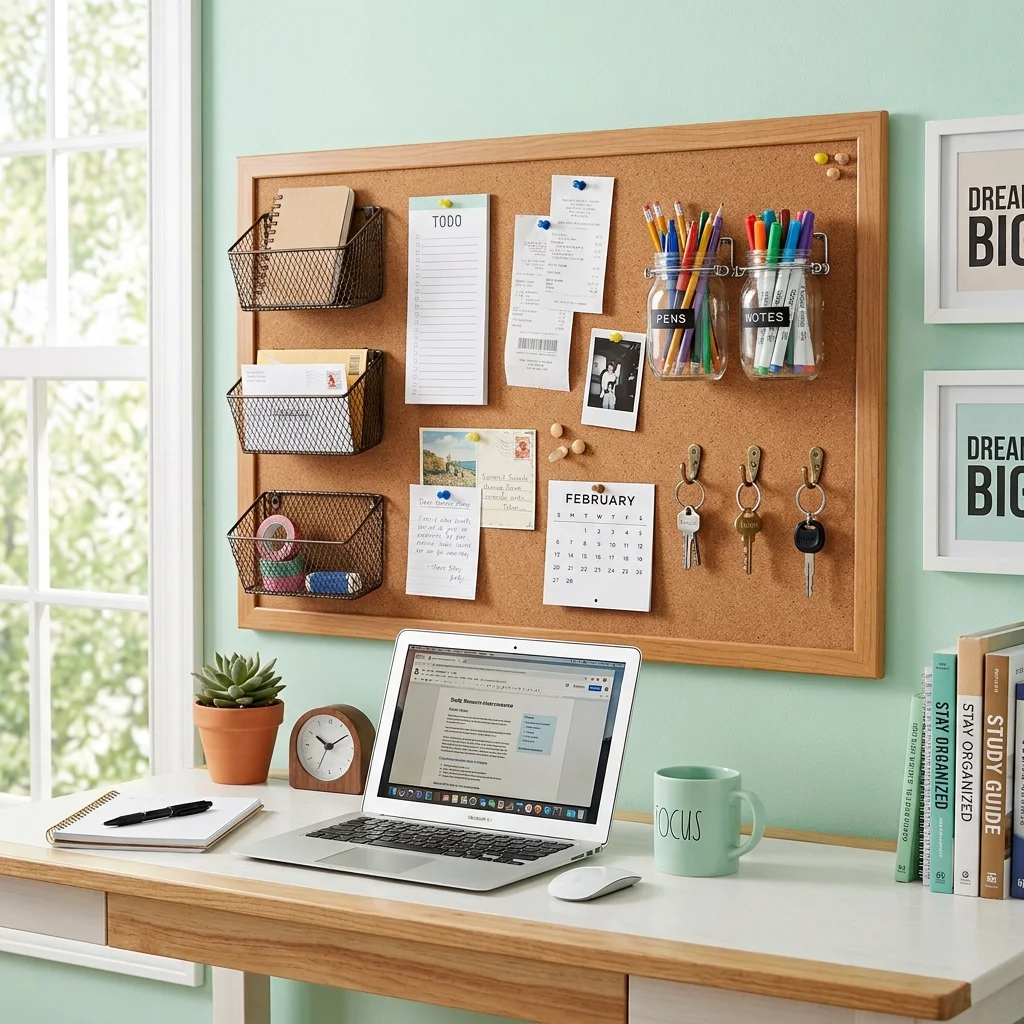
BEFORE: Morning chaos starts with missing keys. Pens roll away, receipts vanish and chargers disappear under textbooks.
AFTER: Every item has a spot at eye level. Pens sit in a clipped jar, keys hang on a hook and receipts wait on a pin.
Tiny rooms where desk space is gone benefit the most from this setup. Mount the board at arm’s reach and use small hooks and clip jars. Keep heavy items off the board, since cork holds light loads best. Stick to pens, keys and a few papers.
Weekly Planner Layout
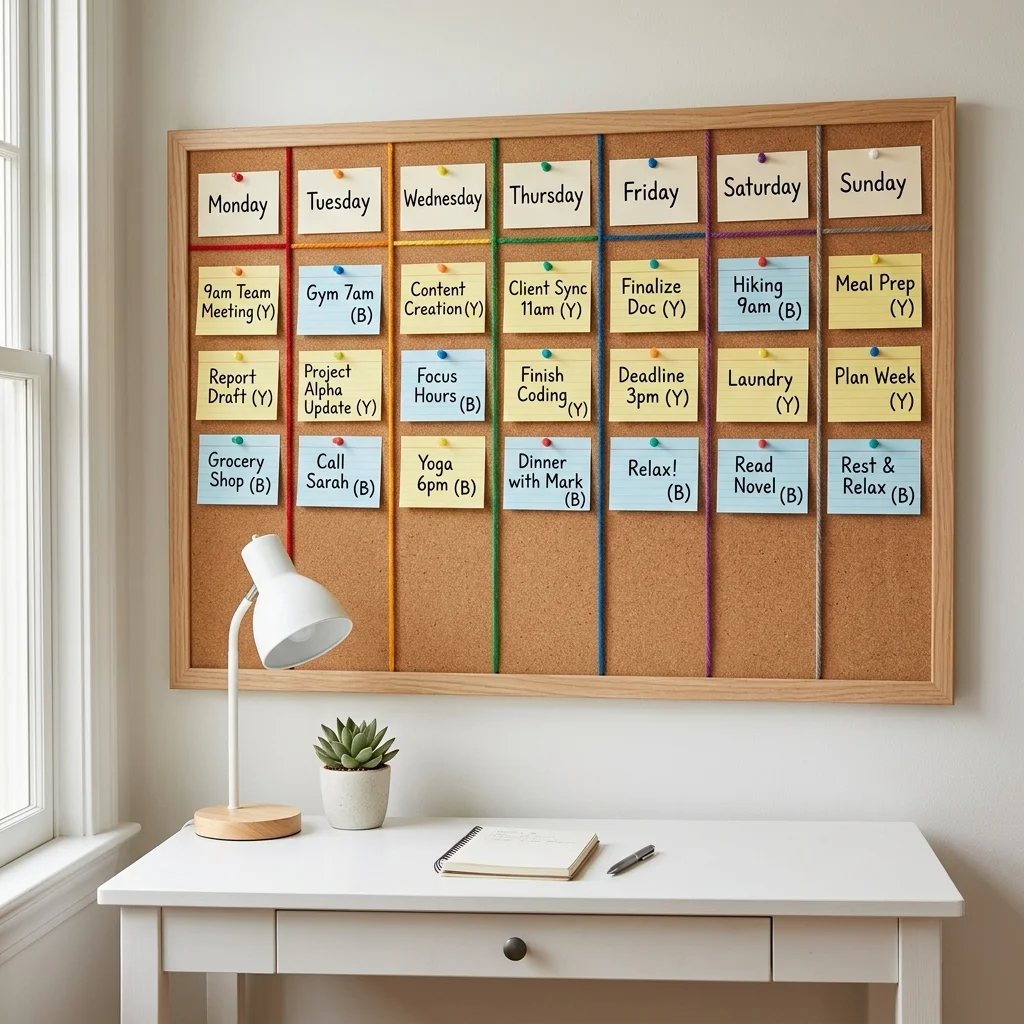
- Stretch colored yarn vertically with pushpins to make seven columns, one per day.
- Write Monday to Sunday on index cards and pin them at the top of each column.
- Put one task per card so you can move it easily if plans change.
- Move finished cards to a “done” pile on the right edge.
Paper planners hide in backpacks, but a board stays in sight. Moving a card from Tuesday to Thursday takes two seconds, which beats rewriting a whole list. Review the layout on Sunday night and again on Wednesday. Tiny check ins keep the week from running away from you.
Painted Cork Board
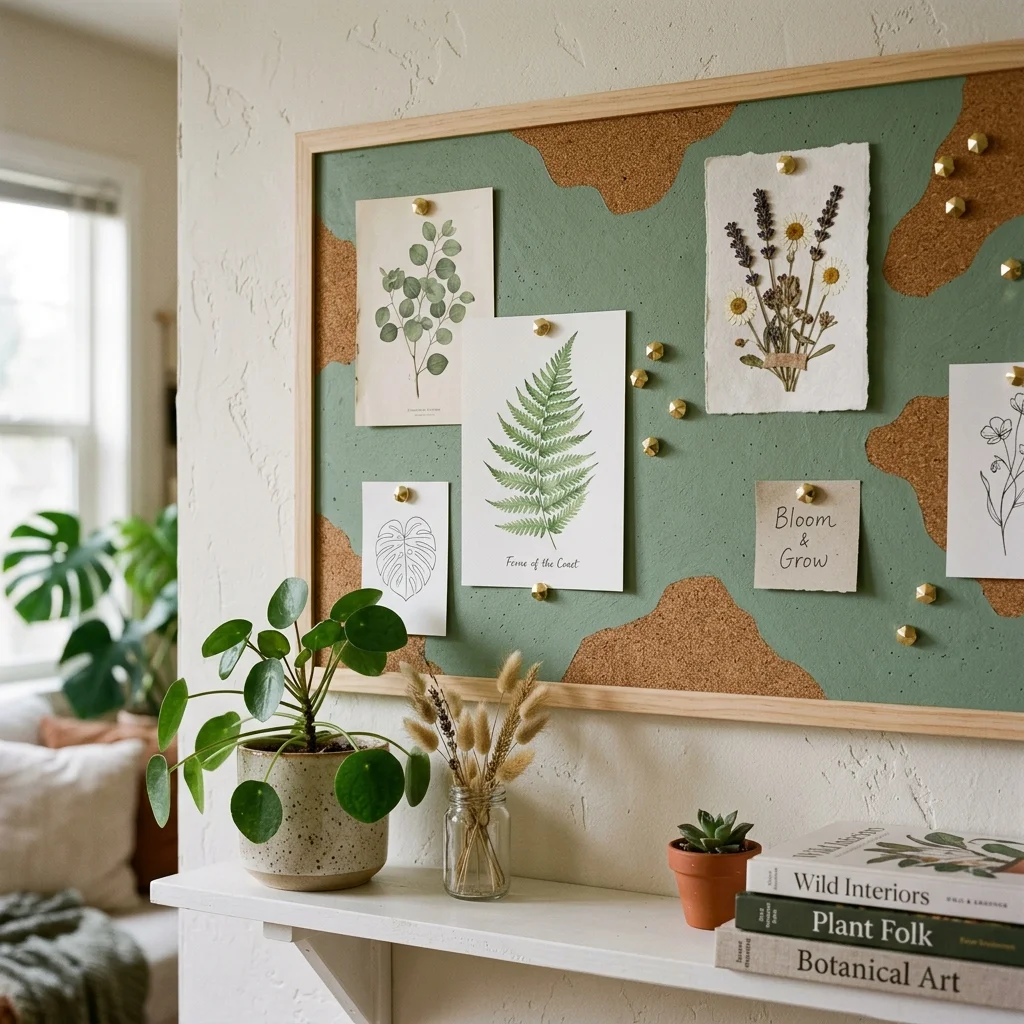
| Point | Natural Cork | Painted Cork |
|---|---|---|
| Color | Tan and speckled | Any shade you choose |
| Pin hold | Strong | Slightly stiffer after paint |
| Effort | None | One hour plus drying time |
| Room match | Neutral only | Matches bedding or walls |
Paint is the cheapest way to match a board to your room. Choose a matte acrylic and apply thin coats with a foam brush so the surface stays pin friendly. Among all college cork board ideas I’ve tried, this one gets the most compliments. Let it dry overnight before pinning.
Quote Wall Display
Do:
- Write short quotes in large, dark letters.
- Keep a consistent card size and paper color.
- Pick lines that mean something to you personally.
- Rotate quotes during exam weeks.
Don’t:
- Don’t fill every inch with text.
- Don’t use pale ink that fades from across the room.
- Don’t copy generic quotes you don’t believe.
- Don’t leave old quotes up forever.
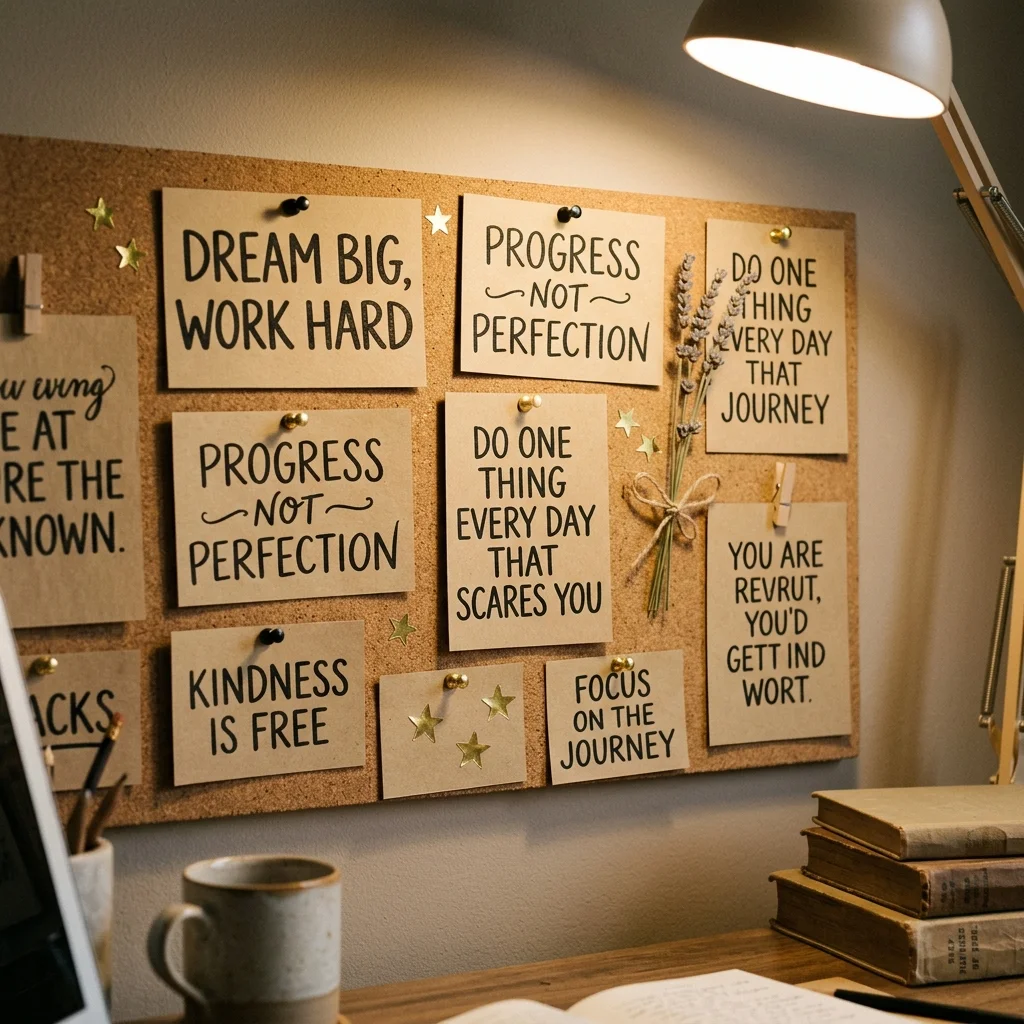
Words on a wall guide your mood more than you expect. Three to five quotes are enough. Write them yourself with a fine marker on kraft cards, then hang them in a line at eye level. Seeing your own handwriting makes each line feel personal and easier to remember.
Budget Board Kit
Cost: Low | Time: One hour | Skill Level: Beginner
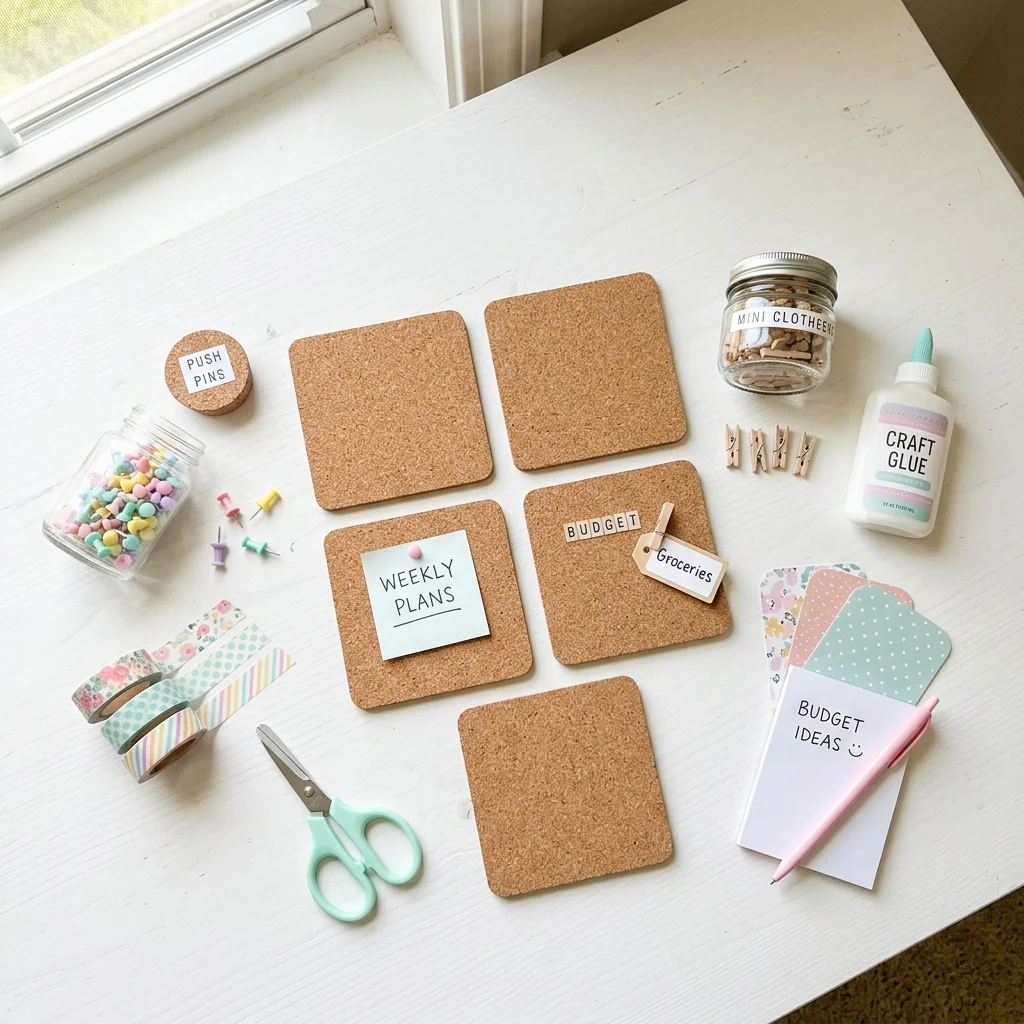
Shopping List: Cork tiles, pushpins, mini clothespins, washi tape
Where to Buy: Dollar stores, campus bookstores, craft shops
Result: A complete board setup on a student budget
Money disappears fast in freshman year, so start small. Buy two tiles instead of one big board, then add pieces as your budget allows. Dollar stores and campus sales are good places to find pushpins and clips. Skip fancy extras until you know your style.
Postcard Travel Map

Every trip deserves more than a camera roll. Pin a world map across the board, then mark each place you have visited with a red pin. Dream destinations get a blue one. A quick glance shows how far you have come and where you want to go next.
Tuck postcards, ticket stubs and boarding passes around the map edges. Study abroad students and road trip friends enjoy this setup because souvenirs finally have a home. Even a day trip to a nearby city counts. Add one new pin after each adventure.
Gold Pin Styling

- Tiny details change a whole board and pins are the easiest detail to upgrade. Swap plastic pushpins for brass or gold ones.
- Place each pin in the top center of a photo so the row looks even.
- Stick to one metal tone. Mixing gold, silver and copper makes the board look busy.
- Use black and white or muted photos to let the gold stand out.
- Buy a pack of at least 50 so you never run short.
A matching set of pins makes simple prints look chosen instead of random. Spacing matters more than color. Leave the same gap between every pin and the board instantly looks neat, even when the photos differ completely.
Hanging Jewelry Board
Quick Tip:
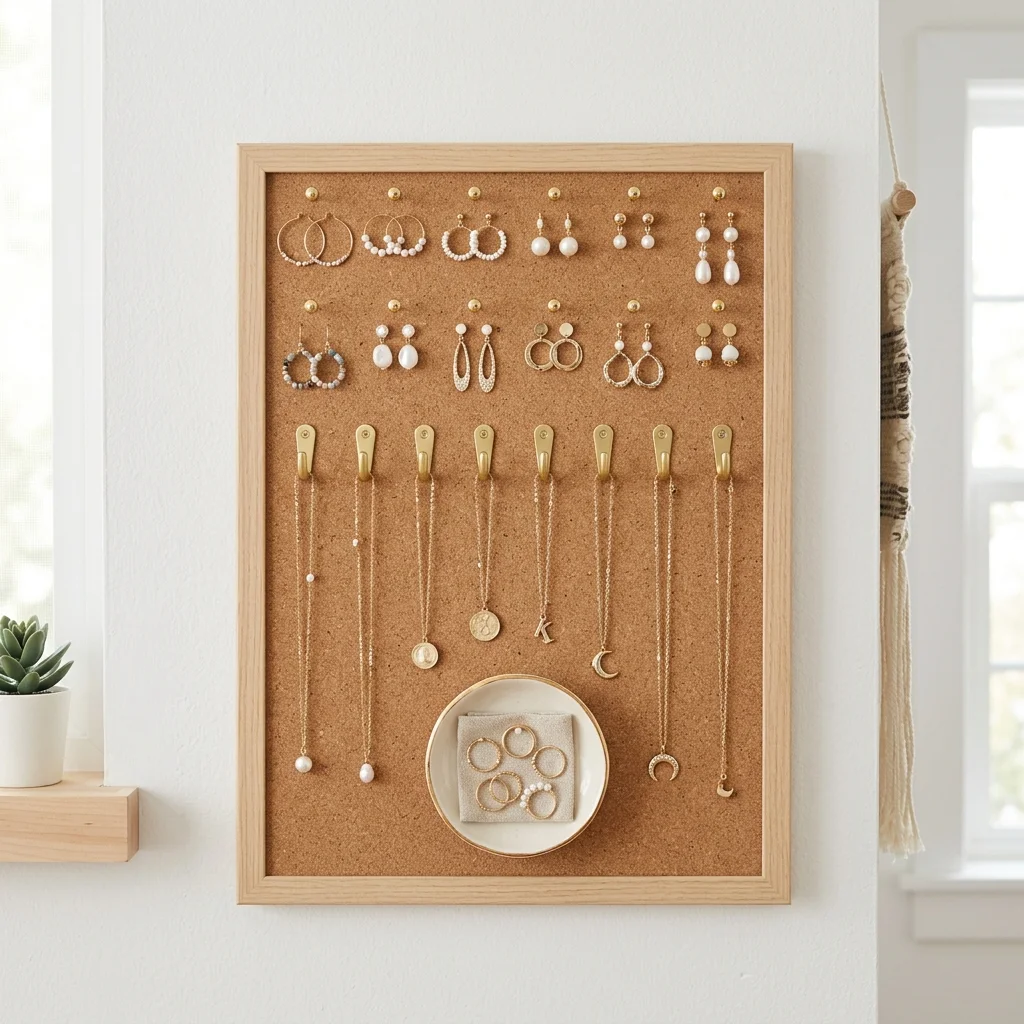
Pin studs and hooks through a small piece of felt so the backs stay hidden and the pins hold firmly. Keep necklaces on separate hooks to stop tangling. Hang the board near a mirror so you can grab and go.
Tangled necklaces waste mornings. A cork board gives every piece a visible place, so you stop digging through drawers. I’d start with earrings, because they fill up fast and get lost easily. Add hooks only for the necklaces you wear weekly. Keep valuable pieces in a locked drawer instead.
Roommate Shared Board
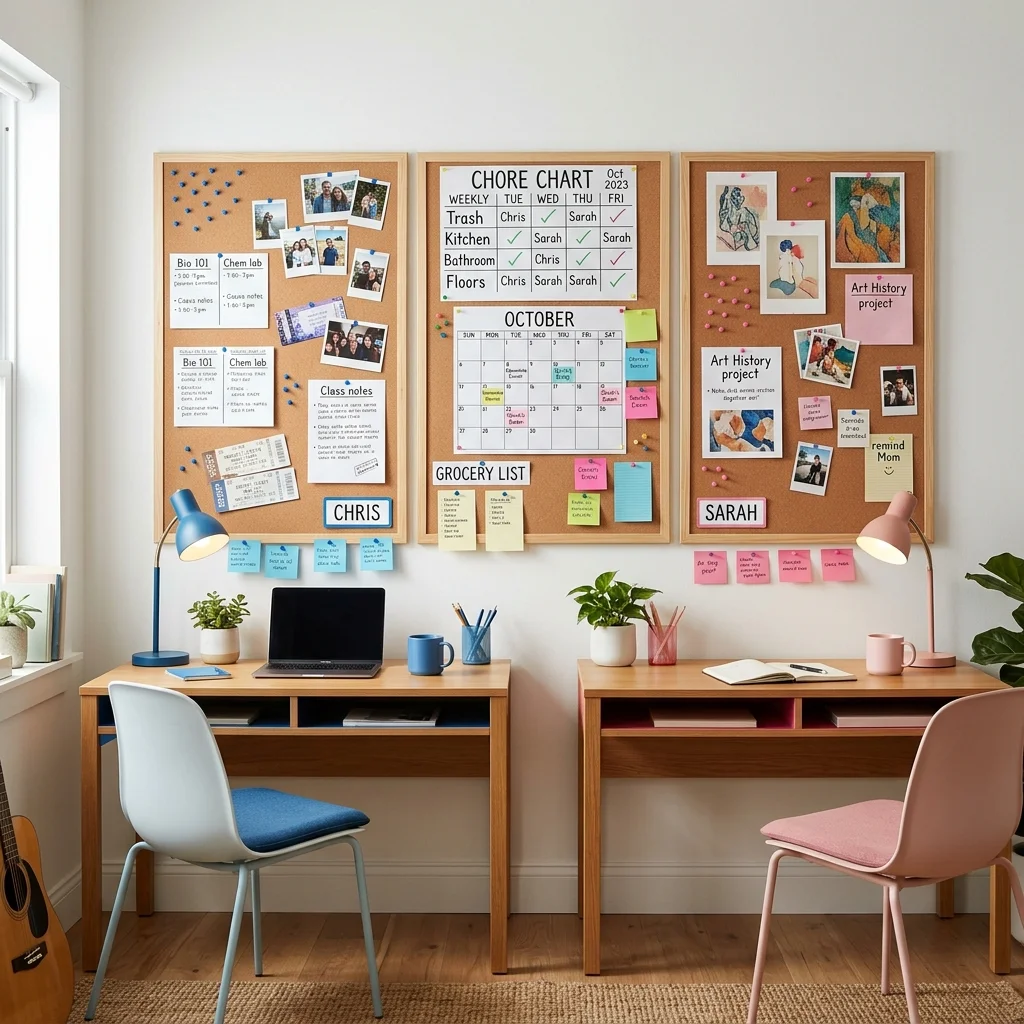
BEFORE: Shared rooms get tense when nobody remembers whose turn it is. Notes get lost and small problems turn into silent frustration.
AFTER: One shared section holds the chore chart, guest schedule and group calendar. Each person still keeps a personal side. Talking gets easier because the plan is visible.
A board between desks works as a neutral zone. Decide the layout together in the first week, before any habits form. I’ve seen roommates avoid awkward arguments simply because the chore chart was in plain sight. Keep your personal side private and the shared side practical.
Command Strip Mounting
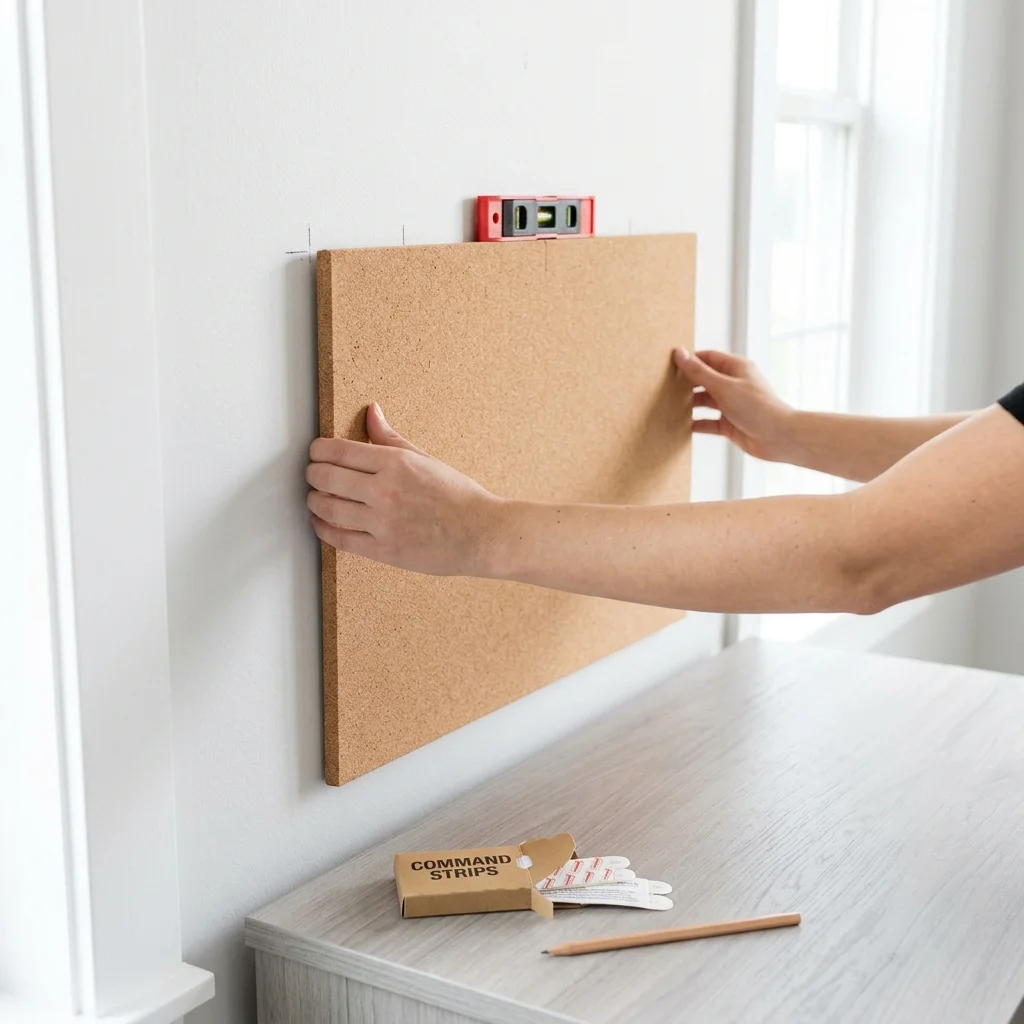
- Wipe the wall with a dry cloth and let it dry fully.
- Check the weight limit on the strips and use more than you think you need.
- Press strips on the back corners and center, then hold the board against the wall for 30 seconds.
- Wait one hour before you pin anything heavy.
- To remove, pull the tab straight down slowly, parallel to the wall.
Dorm rules usually ban nails and damage fees add up. Adhesive strips protect your deposit and hold well on smooth painted walls when the surface is clean. Textured walls and cinder block are the exception, so test one strip first. When in doubt, ask your resident assistant before hanging anything.
Oversized Statement Board

| Point | Small Board | Oversized Board |
|---|---|---|
| Space | Covers a corner | Covers a full wall |
| Impact | Quiet accent | Bold focal point |
| Cost | Low | Higher |
| Storage | Holds a few items | Holds a full semester of memories |
A big board can stand in for framed art. Mount two or three large cork panels side by side to make one wide surface and fill them in layers, starting with big posters and finishing with small photos. Keep a clear border of bare cork so the wall feels intentional, not crowded.
Vintage Ticket Display

Do:
- Group tickets by type, like concerts, movies and trips.
- Pin each ticket by its top edge only.
- Write the date and place lightly on the back in pencil.
- Keep the board out of direct sunlight.
Don’t:
- Don’t push pins through the printed text or barcode.
- Don’t use tape on old thermal paper tickets.
- Don’t pile tickets on top of each other.
Ticket stubs are tiny proof of good nights. Most people toss them or lose them in a jacket pocket. Giving them a spot turns forgotten paper into a record of your college years. Faded thermal print is common, so photograph each ticket first and keep the digital copy safe.
Concert Poster Corner

Cost: Low to medium | Time: One evening | Skill Level: Beginner
Best For: Music lovers and festival fans
Works In: Dorm corners and above desks
Result: A bold wall that shows your taste
Wristbands and tour posters deserve better than a drawer. Loop old festival wristbands around pushpins and overlap posters at the corners for depth. This style looks best when posters share one color mood, such as dark blues. Roll posters backward overnight so they lie flat on cork.
Plant Photo Mix
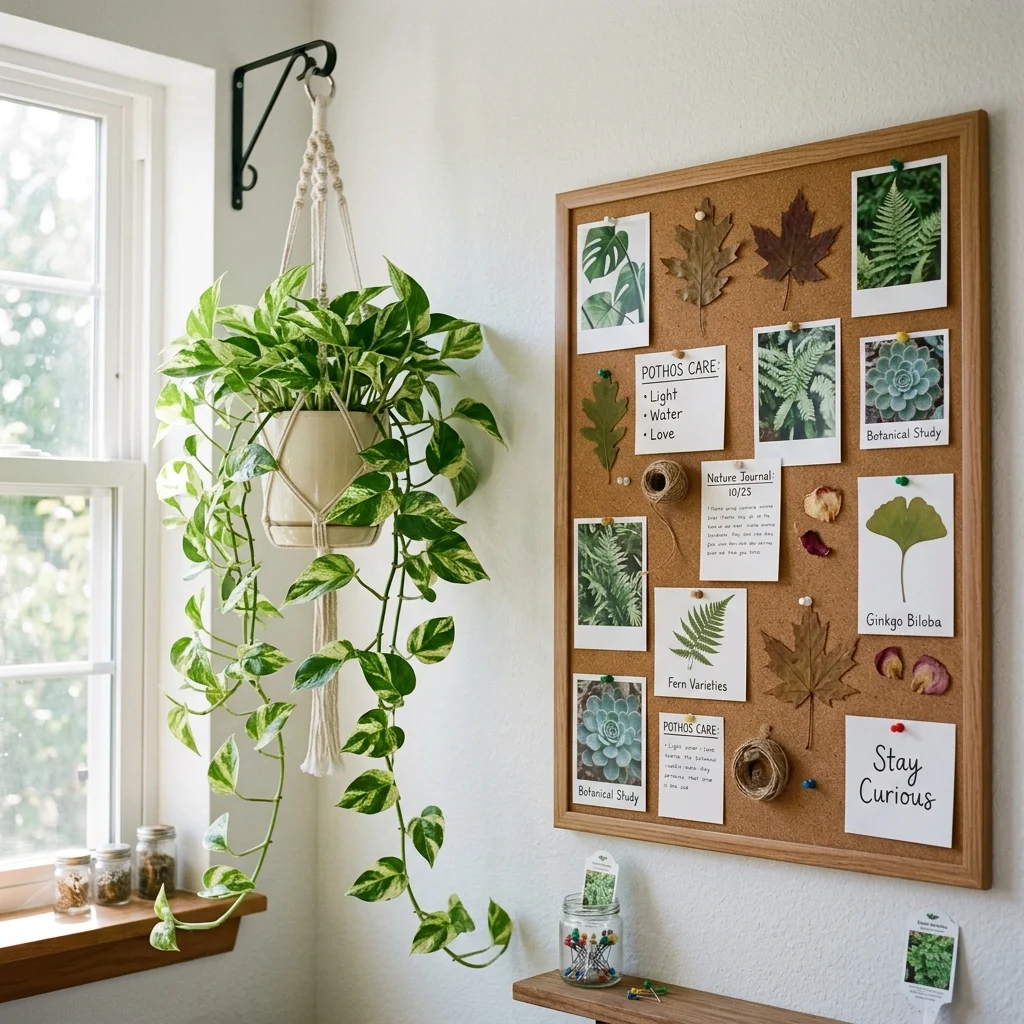
Dorm rooms can feel sealed off from nature. A board of leaf photos, pressed greenery and plant care cards brings a little outdoors inside. Hang a trailing pothos from a nearby hook and let the vines drift along the board edge. Green and cream tones keep everything calm.
Add a small card for each plant with its watering schedule. Pothos handle low light and forgetful owners, so they suit busy students. Press a few leaves between heavy books for a week, then pin them as natural art. Check plant rules with housing first.
Dorm Recipe Board
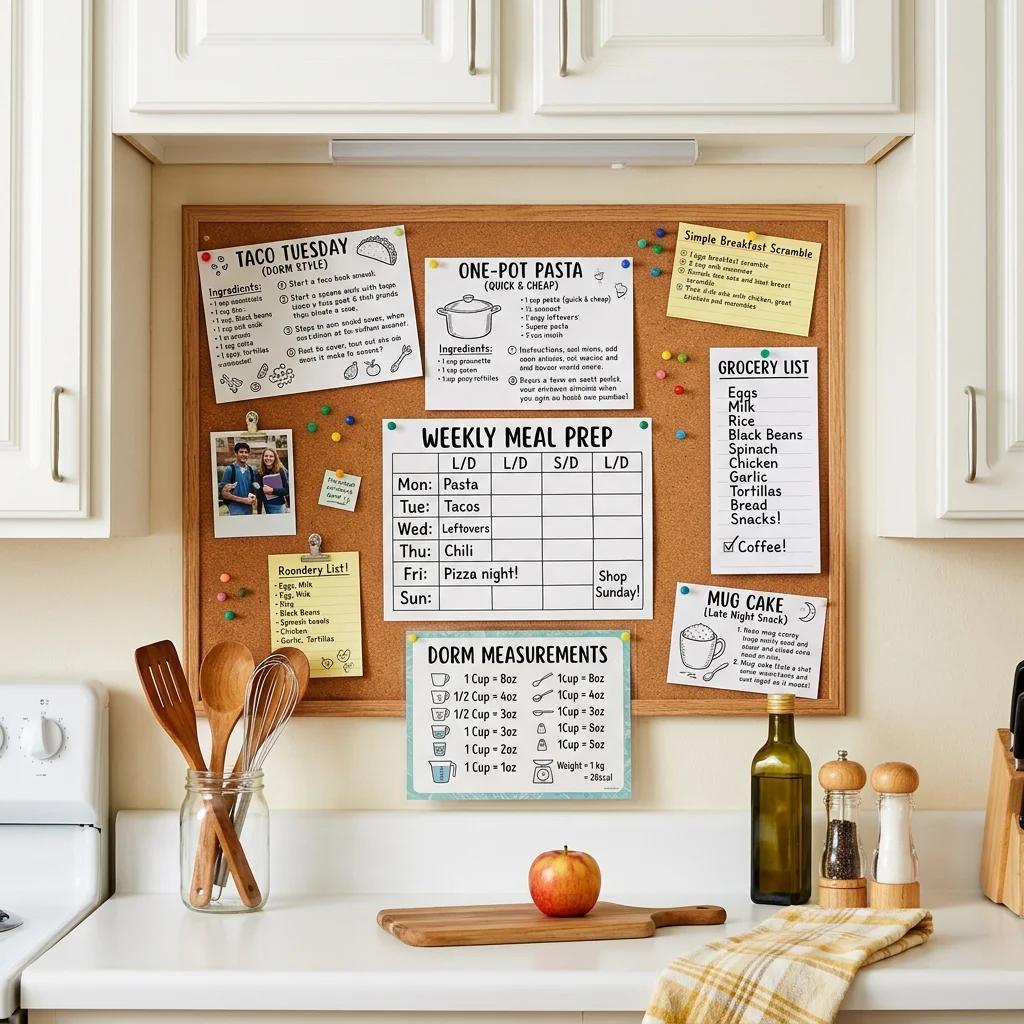
- Ramen gets old fast, so pin five easy recipes you actually like. Choose ones with fewer than six ingredients.
- Add a conversion chart for cups, tablespoons and grams so you stop guessing.
- Keep a running grocery list on a notepad hanging from a pin.
- Pin a weekly meal plan to avoid ordering takeout out of boredom.
- Write the safe internal temperature for chicken, 165°F (74°C), on a small card.
Recipe cards beat scrolling with greasy fingers. Write each one big enough to read from the counter and slip them into a clear sleeve to block splashes. Having the list in sight often cuts impulse takeout orders. Rotate the recipes monthly so meals stay interesting.
Seasonal Swap Board
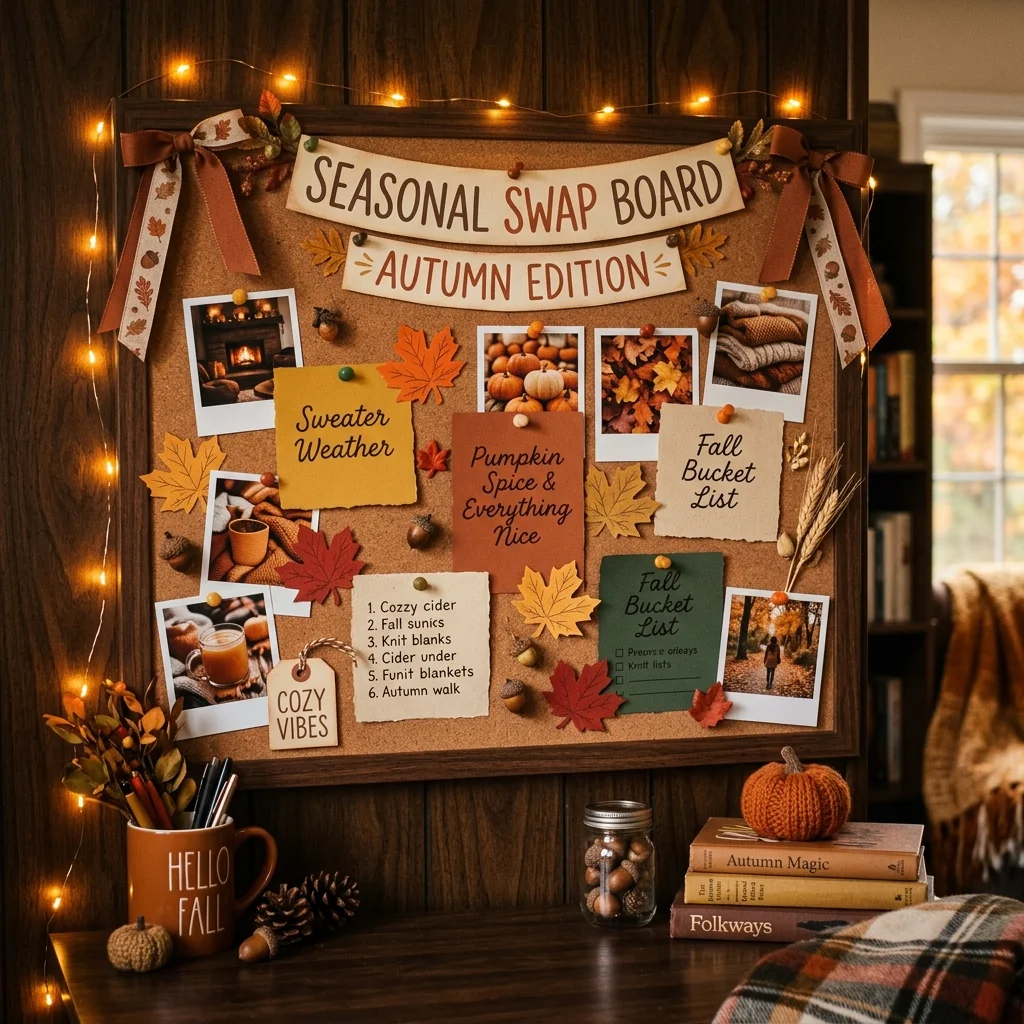
Quick Tip:
Keep a flat folder for each season’s decorations so swapping takes five minutes. Change only the accents, like ribbon, paper cutouts and a few cards and leave your main photos in place. Set a phone reminder for the first day of each season.
Fresh decor keeps a small room from feeling stale. Autumn gets warm oranges, winter gets white and silver, spring gets pastels and summer gets bright yellow. Cut shapes from craft paper for almost nothing. Four quick refreshes a year make the board feel new without a full redo.
Gallery Row Layout
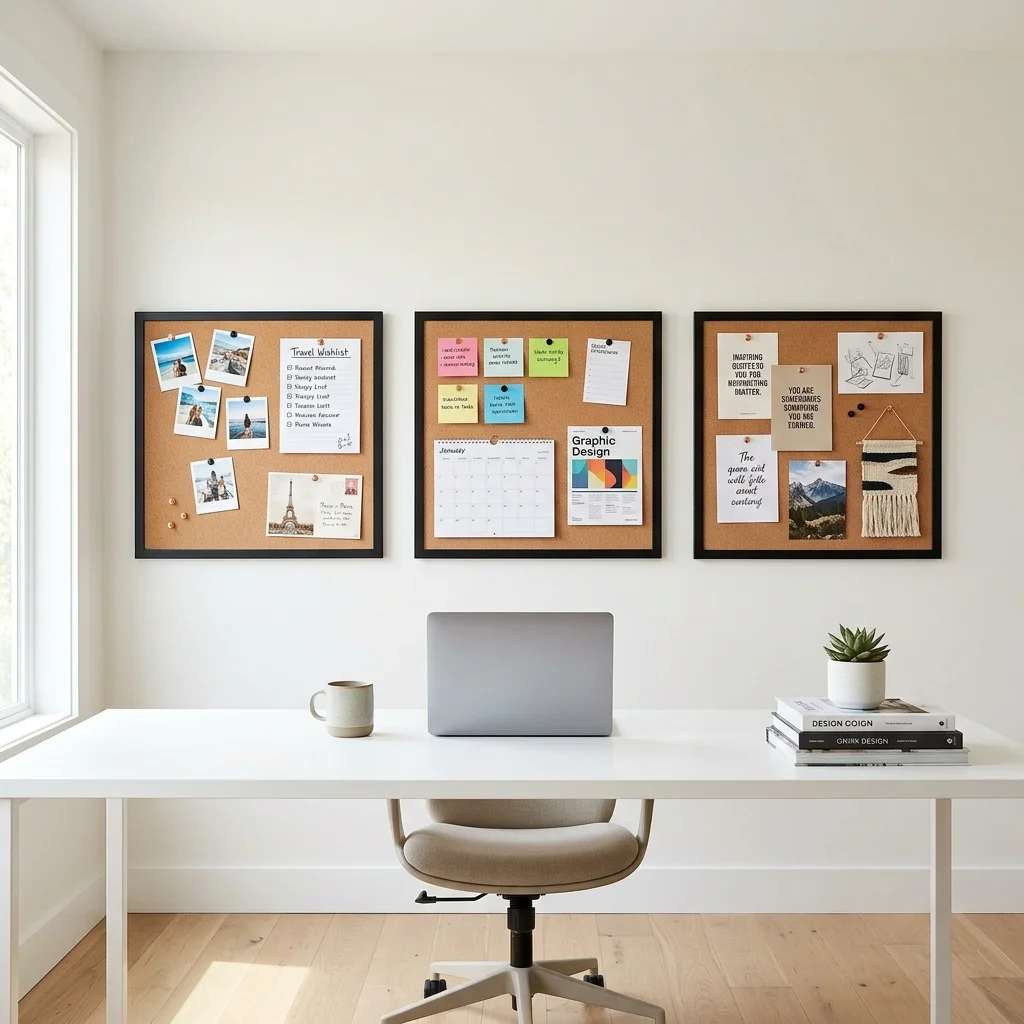
BEFORE: One crowded board hides everything important. Photos, deadlines and reminders blend into a noisy mess.
AFTER: Three boards split the jobs: memories on the left, tasks in the middle and inspiration on the right. Each stays calm and your eyes know where to look.
Matching boards hung at the same height look like gallery art. Leave two inches between them and align the bottom edges with a level. Among the best college cork board ideas for long stays, this layout grows with you, since you can add a fourth board next year.
Conclusion
You do not need a big budget or a design degree to make your room feel personal. A few pins, some photos and one clear idea are enough to start. I’ve seen how small changes like these can completely shift the way a space feels and a cork board is one of the easiest places to begin. Whether you want a cleaner desk, a warmer bedroom wall or a calmer study corner, these college cork board ideas give you plenty to try. Save this post on Pinterest, pick one idea tonight and share it with a friend who needs a dorm refresh.