27 Under Kitchen Sink Organization Ideas to Save Space
That awkward cabinet under the kitchen sink can become a clutter magnet fast. Bottles tip over, sponges disappear and useful space gets buried behind plumbing.
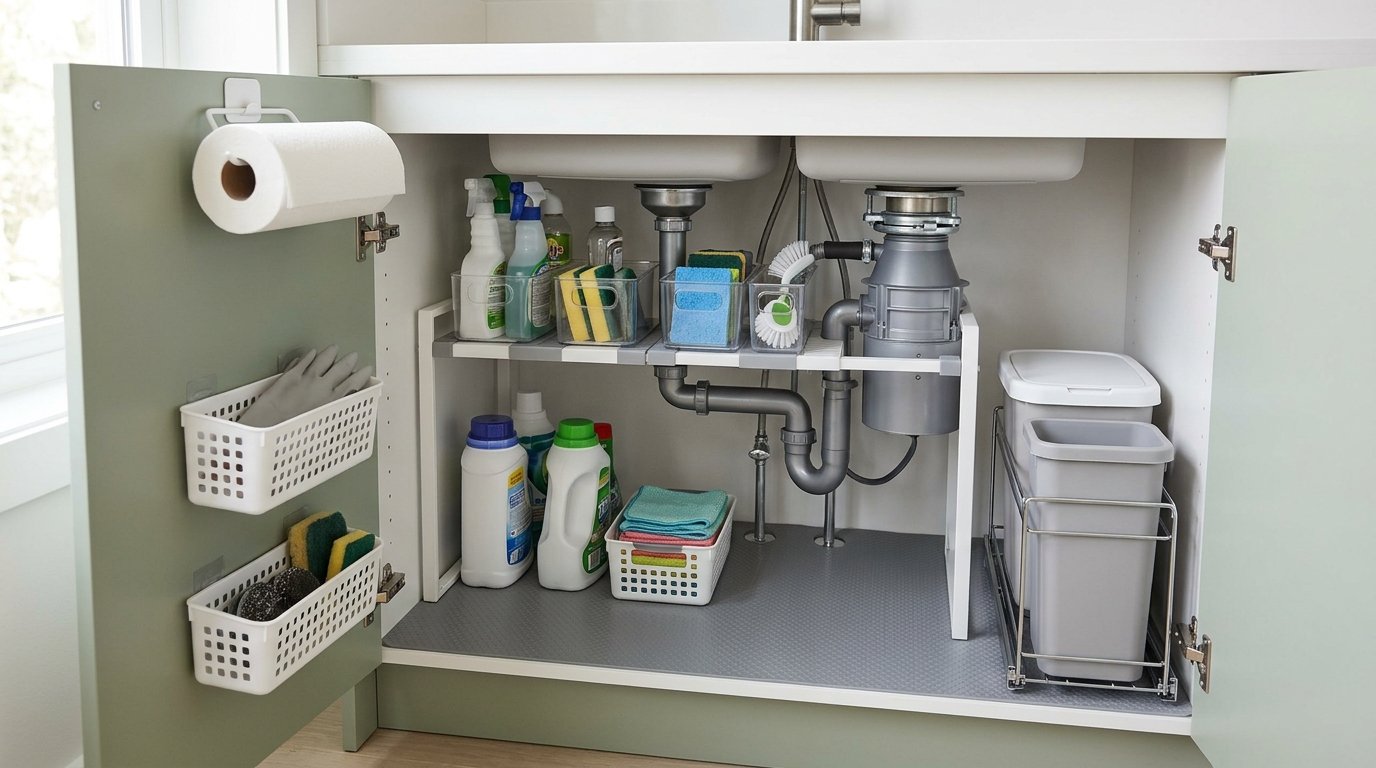
These Under Kitchen Sink Organization Ideas show practical ways to turn that messy cabinet into a storage area that feels simple and manageable. You’ll find smart solutions for cleaning bottles, sponges, gloves, cloths, dishwasher supplies and other everyday essentials. The ideas work with different cabinet sizes, including narrow spaces where every inch matters. In my experience, the biggest improvement often comes from separating supplies into clear zones instead of trying to fit everything into one large container. With the right setup, finding what you need becomes easier, cleaning takes less time and the entire kitchen feels more orderly.
Pull-Out Storage Bins
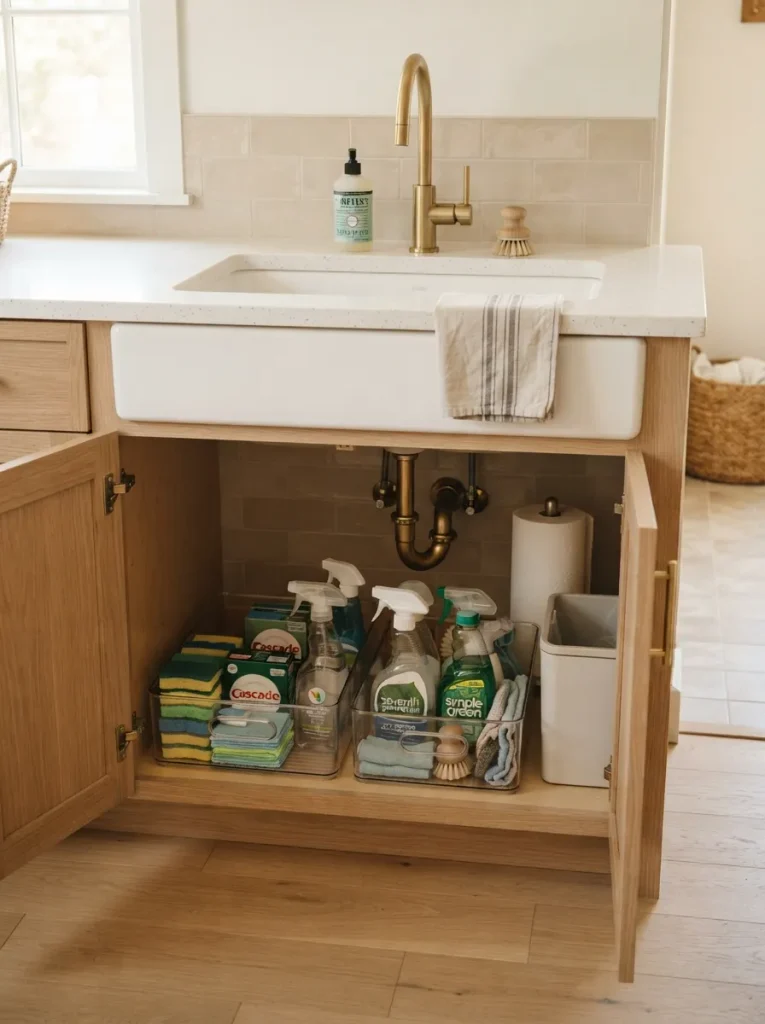
A deep cabinet can hide supplies at the back, making everyday items annoying to reach. Pull-out bins solve that problem by bringing the contents forward. Choose bins with sturdy handles and smooth runners, then assign each container a clear category such as cleaning sprays, cloths or dishwasher supplies.
Keep the most-used products in the front section and backups farther back. Leave enough clearance around plumbing so the bins slide without catching. In my experience, transparent or open-sided containers work especially well because you can spot low supplies quickly without pulling everything out of the cabinet.
Tension Rod Storage
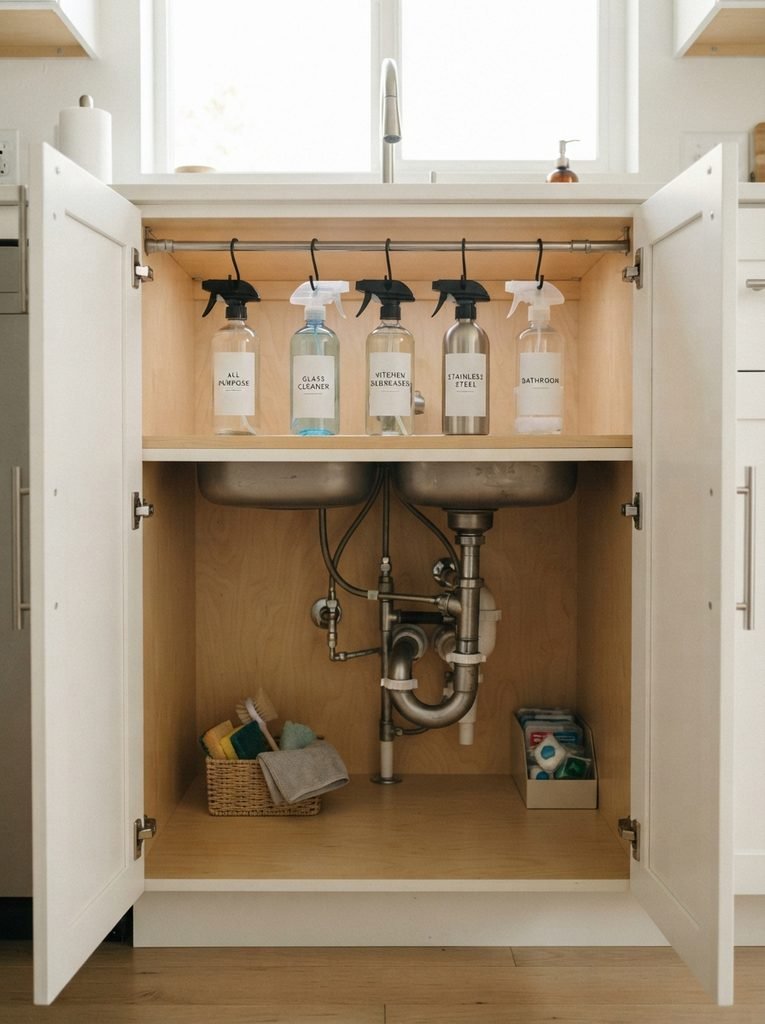
- Measure the cabinet width before choosing a tension rod so it fits securely between the side panels.
- Hang spray bottles from sturdy hooks placed along the rod.
- Keep heavier bottles near the cabinet sides where they are easier to support.
- Leave space underneath for bins, cloths or cleaning supplies.
- Choose a rust-resistant rod designed for damp cabinet interiors.
A simple tension rod creates an extra storage level without drilling into the cabinet. Spray bottles hang neatly above the base, freeing valuable floor space underneath. Keep the rod slightly below the plumbing so bottles remain easy to remove. This setup works especially well in narrow cabinets with limited shelf space.
Stackable Containers
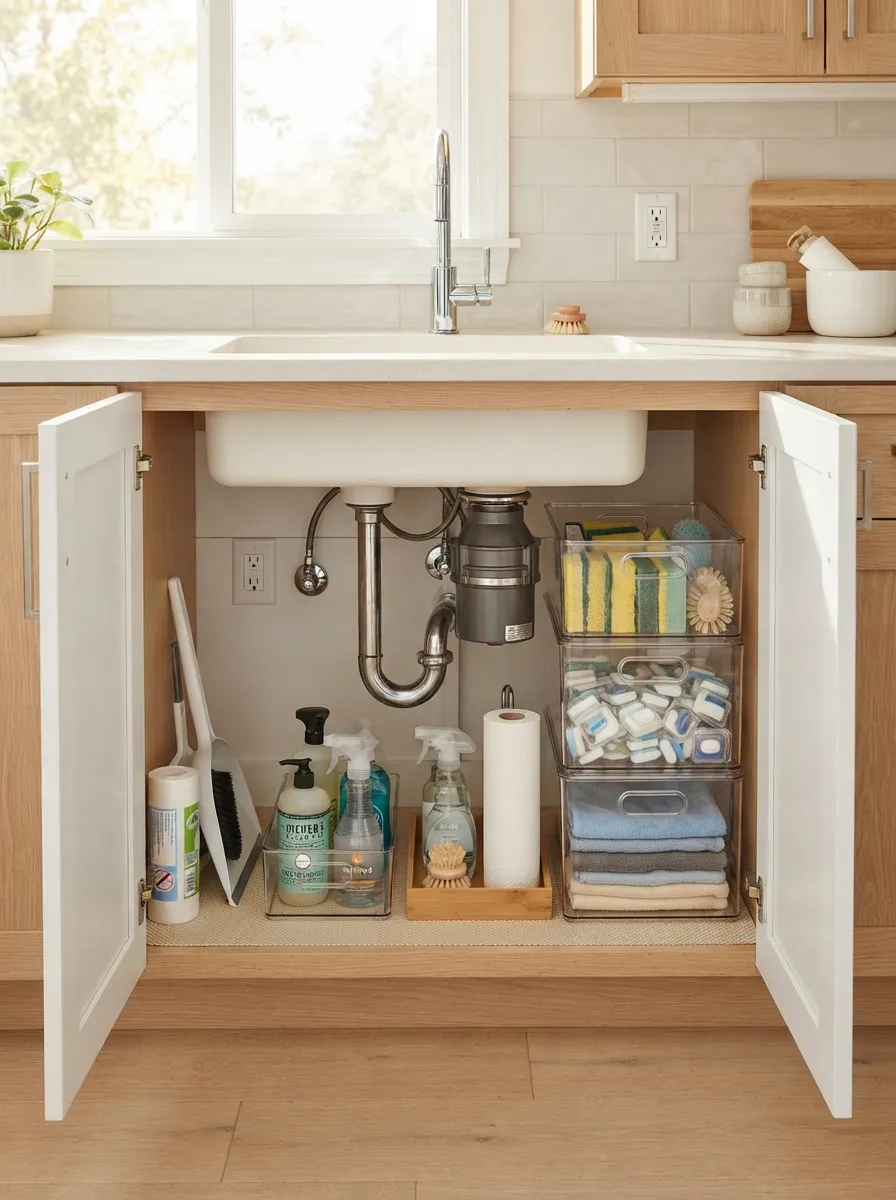
Quick Tip:
Choose containers with flat, stable lids so they can stack securely without wobbling. Use taller containers for refill bottles and smaller ones for sponges or loose cleaning accessories. Label the front edge of each container so you can identify contents without removing the stack.
Stackable containers make vertical cabinet space more useful while keeping small supplies contained. Place heavier containers on the bottom and lighter ones above them. Leave a small gap around plumbing and cabinet walls so everything stays accessible. I’ve noticed that clear containers make restocking easier because low supplies are visible at a glance.
Door-Mounted Baskets
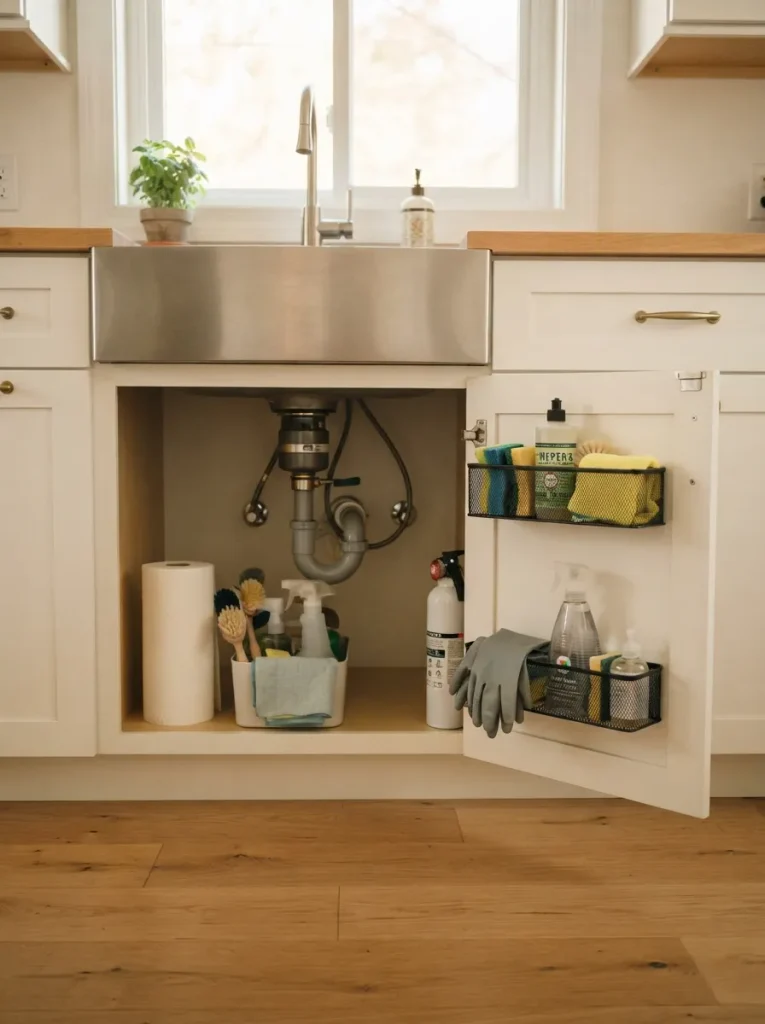
A door-mounted basket turns unused cabinet-door space into convenient storage. Keep frequently grabbed items such as scrub brushes, gloves and sponges near the top. Reserve lower baskets for backup supplies. Secure the hardware properly, especially on thin cabinet doors, so the added weight does not cause sagging.
Adjustable Shelf Riser
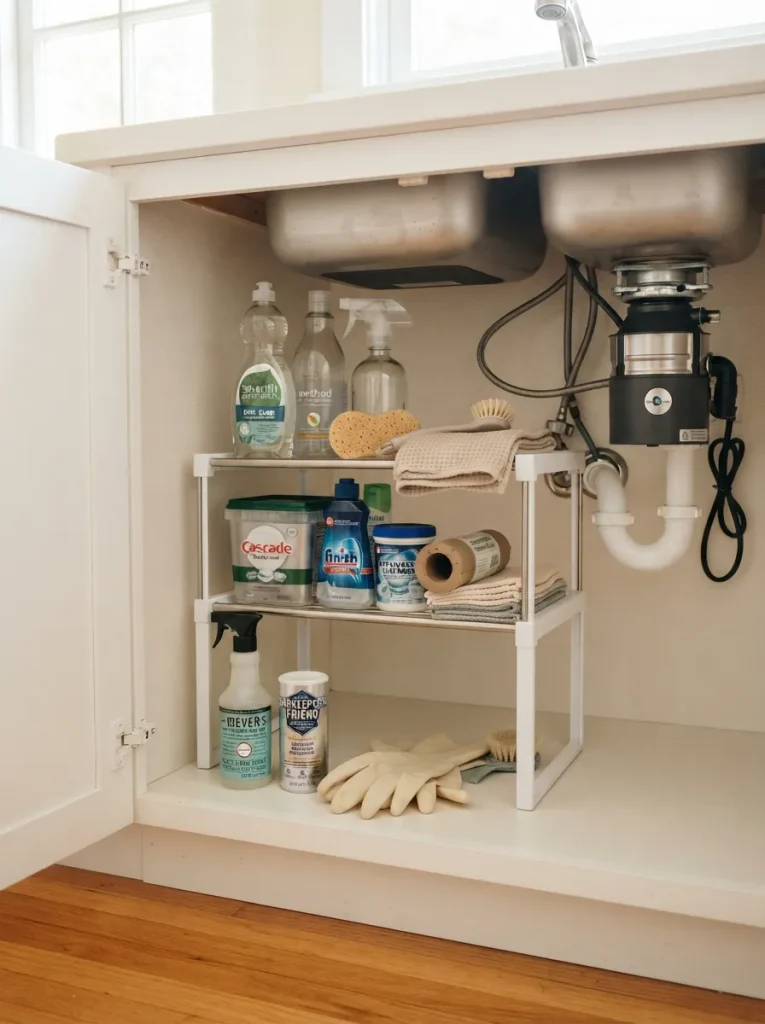
- Measure the cabinet: Check the width, height and plumbing position before choosing a riser.
- Set the height: Adjust the shelf so taller bottles fit underneath without wasting vertical space.
- Group supplies: Keep similar products together on each level for easier access.
- Leave clearance: Make sure doors, pipes and stored containers do not interfere with one another.
An adjustable riser makes better use of the cabinet’s vertical height without permanent installation. Place shorter items on the upper level and taller bottles below. This arrangement keeps products visible instead of stacking them randomly. A removable riser also works well for renters who need flexible storage.
Clear Acrylic Trays
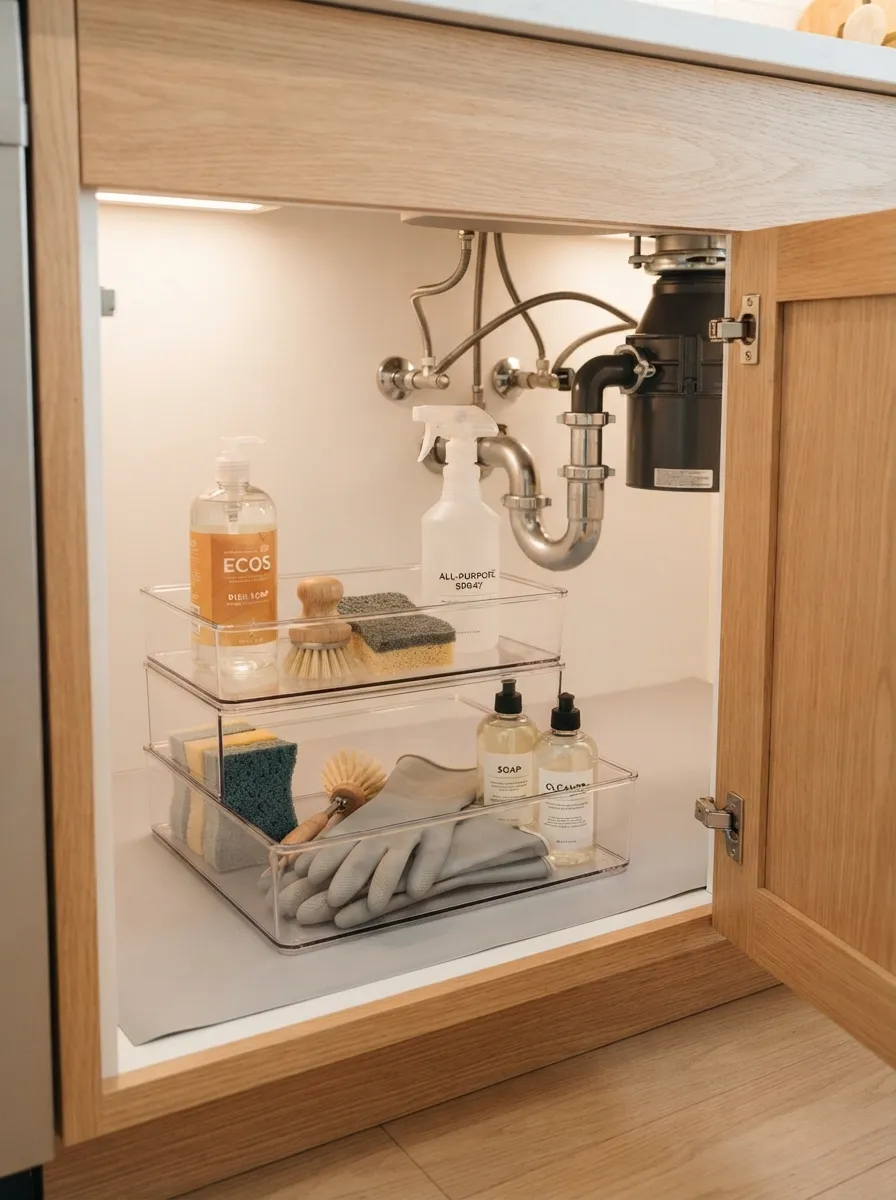
| Comparison Point | Option A: Clear Trays | Option B: Open Shelf |
| Visibility | Contents are easy to see | Contents remain visible |
| Cleaning | Easy to remove and wipe | Requires wiping in place |
| Small items | Keeps them contained | May scatter |
| Flexibility | Easy to rearrange | Usually stays fixed |
Clear trays keep small cleaning supplies grouped while making every item easy to spot. Choose trays with low sides for quick access and handles for easier removal. Keep liquids upright and avoid overcrowding. A removable tray is especially useful when you need to clean spills or reach plumbing underneath.
Hanging Cleaning Caddy
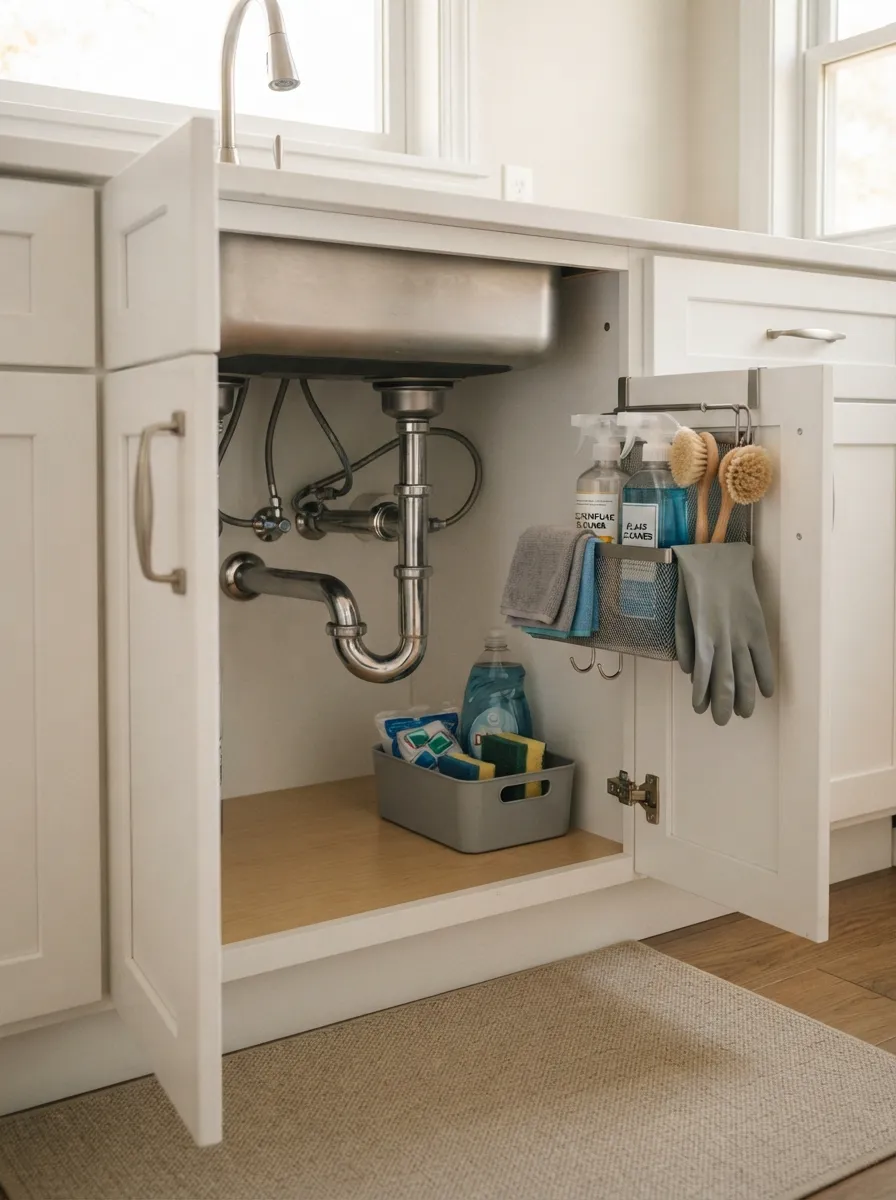
DO:
- Choose a caddy that fits beside the plumbing without blocking pipes.
- Store lightweight cleaning tools and frequently used bottles together.
- Select rust-resistant plastic or coated metal for damp areas.
- Keep the caddy removable so cabinet cleaning stays simple.
DON’T:
- Overload the caddy with heavy bottles.
- Block the cabinet door hinges or water shutoff valves.
- Store leaking containers above electrical equipment.
- Let wet cloths sit inside without airflow.
A hanging caddy gives narrow cabinet walls a useful purpose while keeping cleaning tools together. Place it on the side with the most available clearance and reserve the cabinet floor for larger supplies. I’ve noticed this setup works especially well when every inch of the cabinet already has a storage job.
Under-Sink Drawer
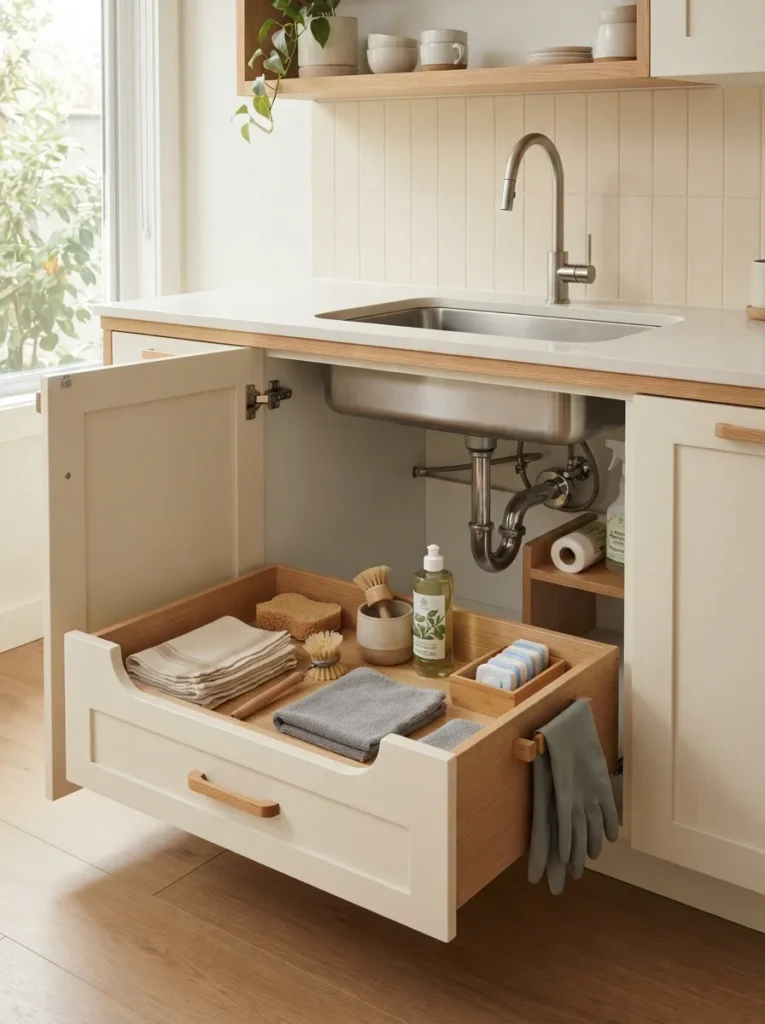
Cost: Moderate | Time: One day | Skill Level: Intermediate | Best For: Frequently used supplies
A shallow drawer near the cabinet opening keeps small cleaning essentials visible and easy to reach. Store sponges, brushes, gloves and dishwasher tablets inside instead of letting them collect on the cabinet floor. Choose a drawer system that accounts for plumbing, leaving enough room for pipes and shutoff valves.
Vertical Bottle Rack
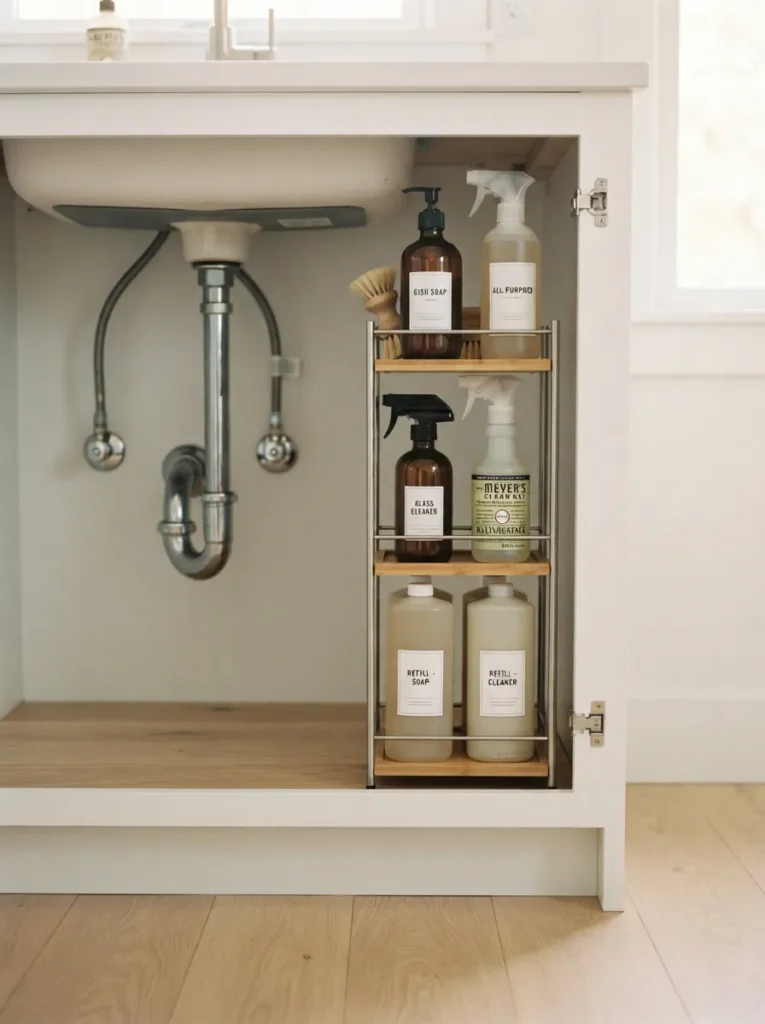
A vertical bottle rack prevents tall cleaning products from tipping over or spreading across the cabinet floor. Arrange bottles by frequency of use, keeping daily products toward the front. Choose a narrow rack with raised edges so containers stay upright. Leave a clear path around plumbing for quick access during maintenance.
Lazy Susan Organizer
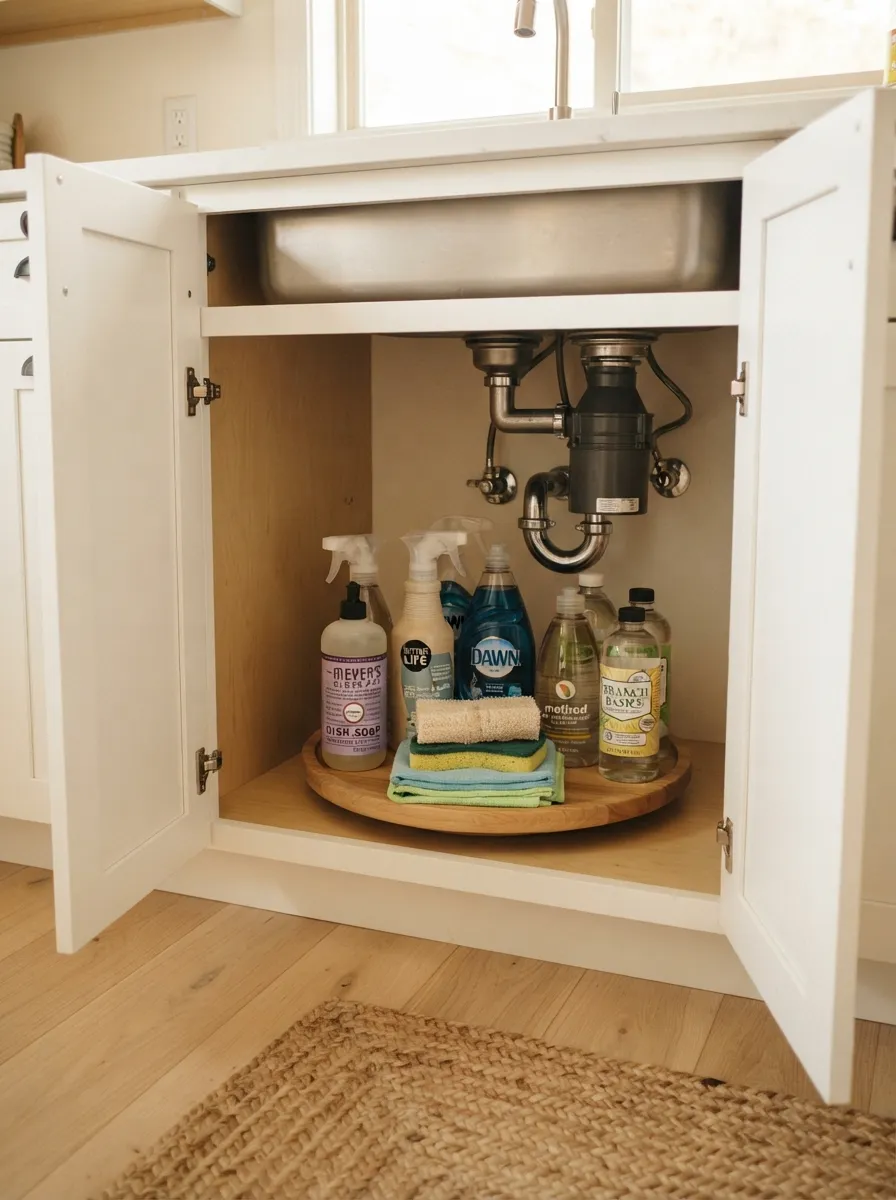
Cost: Low to moderate | Time: 10 minutes | Skill Level: Beginner | Best For: Deep cabinets
A lazy Susan makes deep cabinet corners easier to reach without moving several bottles first. Place frequently used products around the outer edge and backups toward the center. Choose a model with a raised rim to prevent bottles from sliding off as you rotate it.
Labelled Storage Bins
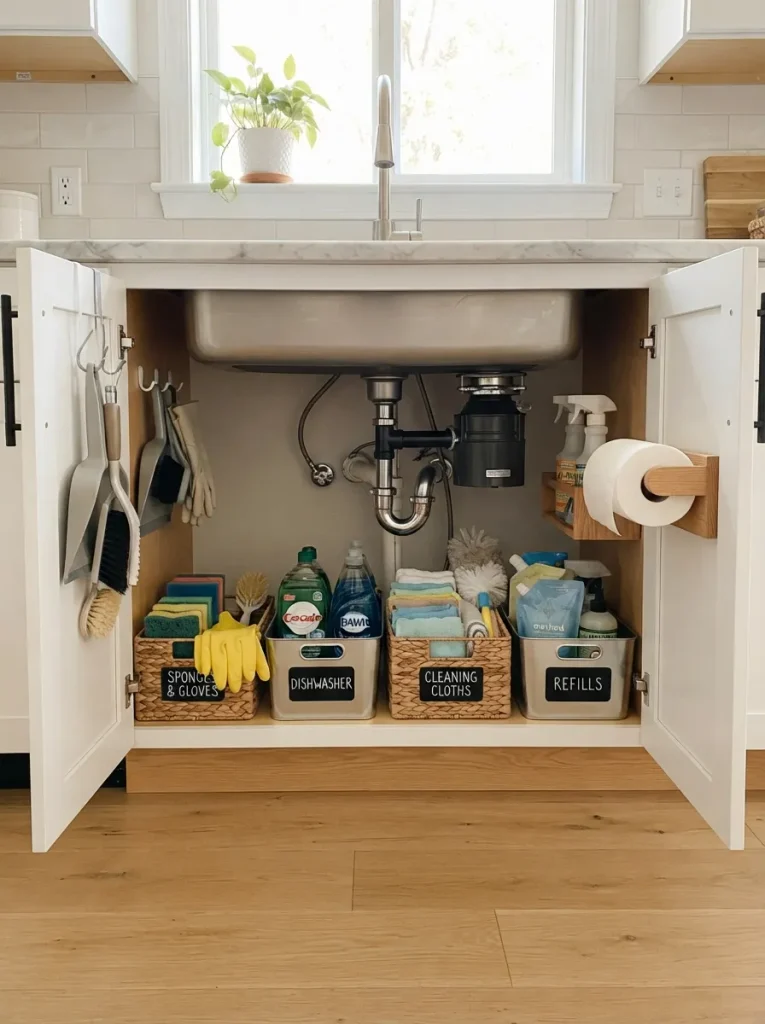
Label each bin according to its main purpose, such as sponges, dishwasher supplies, gloves or refills. Keep labels facing outward so you can identify contents immediately. Matching containers create a cleaner appearance, but different sizes can work well when cabinet space is irregular.
Clear categories make the cabinet easier to maintain because every item has a designated home. Store frequently used supplies in the easiest-to-reach bin and keep occasional items farther back. I’ve noticed that simple labels are particularly helpful in busy kitchens because everyone can quickly return products to the right place.
Magnetic Side Storage
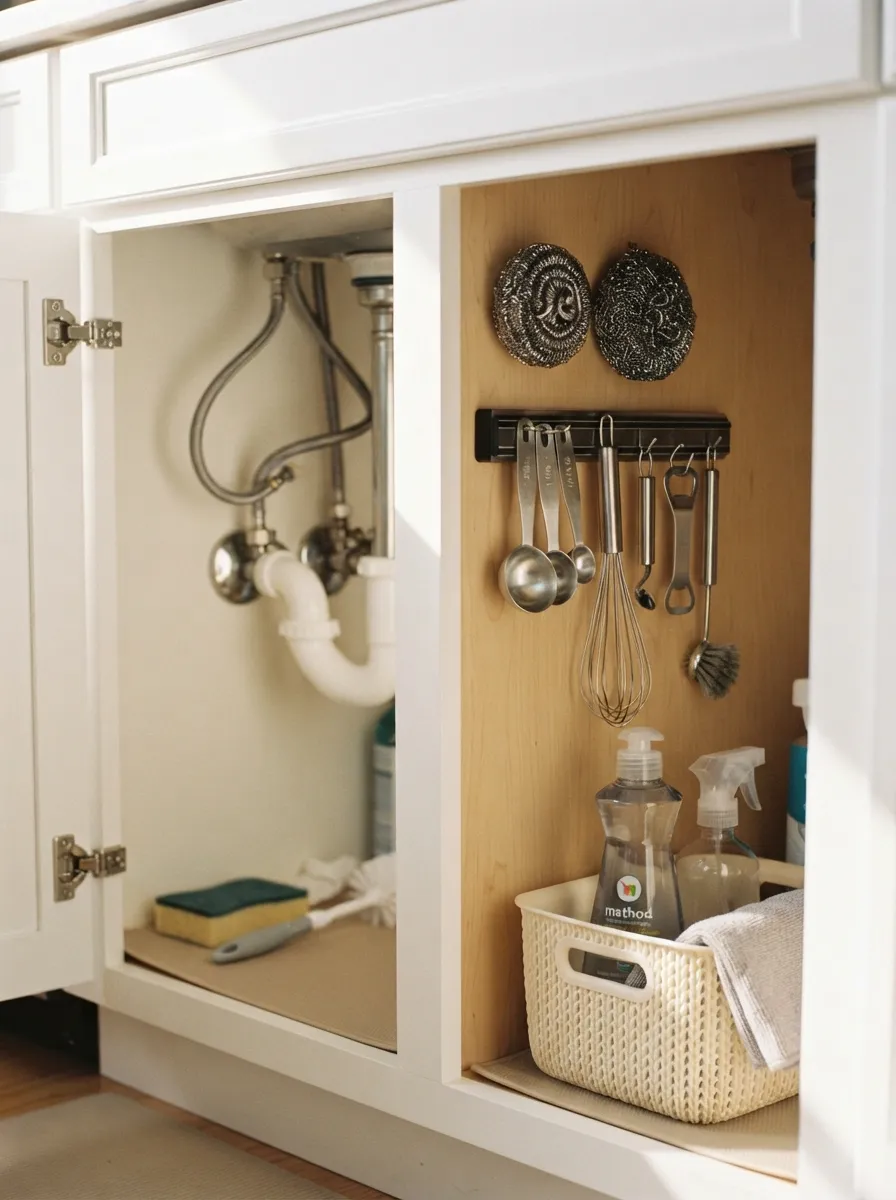
- Check the surface: Make sure the cabinet side is suitable for a secure magnetic strip.
- Store small tools: Use it for metal clips, scrubbers or lightweight cleaning accessories.
- Keep tools visible: Position the strip near the cabinet opening for quick access.
- Avoid wet storage: Let metal items dry before placing them on the strip.
- Protect sharp items: Keep pointed tools away from areas children can reach.
A magnetic strip uses a narrow section of cabinet wall that often goes unused. It keeps small metal tools off the cabinet floor and prevents them from getting buried beneath bottles. Position it away from plumbing and moisture, then reserve the remaining space for bins and larger cleaning products.
Removable Cabinet Hooks
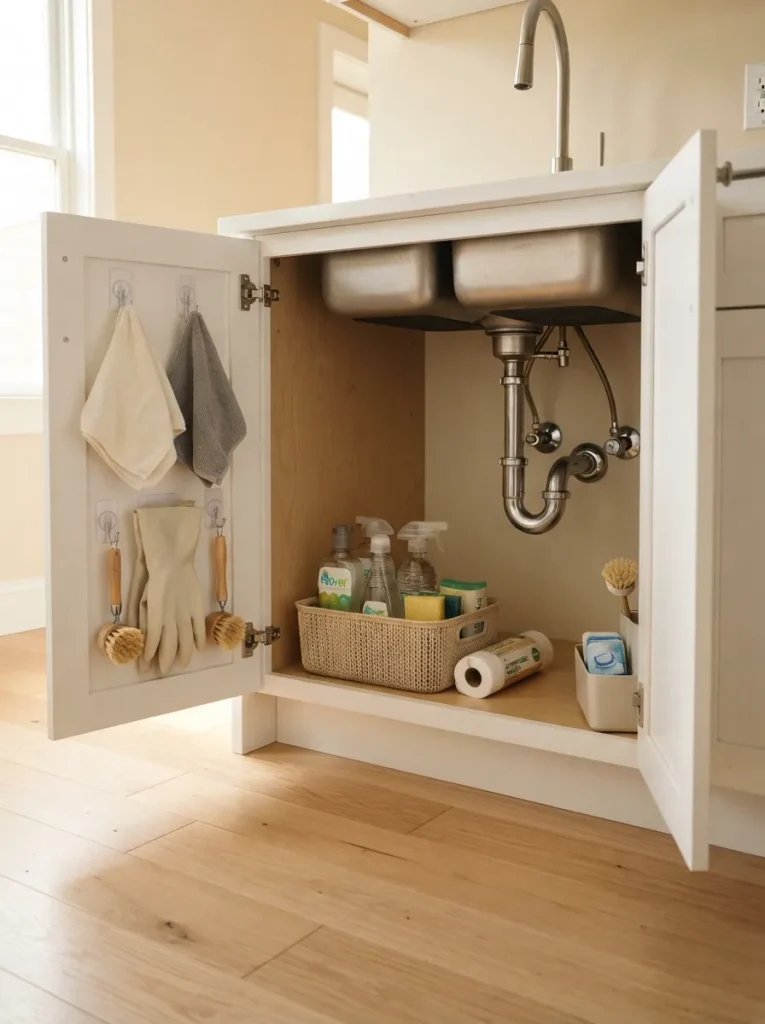
Cost: Low | Time: 10 minutes | Skill Level: Beginner | Best For: Renters and small cabinets
Removable hooks create instant hanging space without drilling holes into the cabinet. Use them for lightweight cloths, gloves or small brushes that are used regularly. Choose hooks rated for the expected weight and follow the adhesive instructions carefully so they stay secure in a damp kitchen environment.
Two-Level Basket System
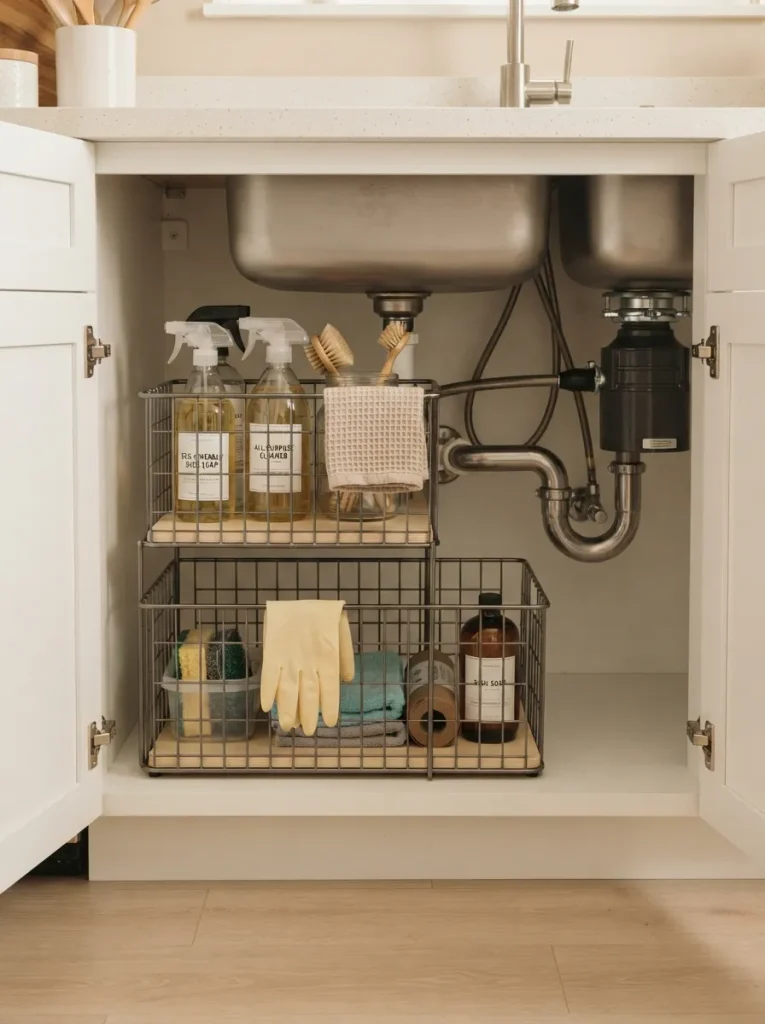
Two levels can turn a cluttered cabinet floor into clearly separated storage zones. Place everyday cleaning supplies in the upper basket and heavier refill products below. Choose baskets that leave enough space around the plumbing and make sure the lower basket can slide out without hitting cabinet hinges or pipes.
A stacked basket system works best when each level has a specific purpose. Keep small items inside a tray or container so they do not fall through wire gaps. Leave some empty space rather than filling every inch, since easy access matters just as much as storage capacity.
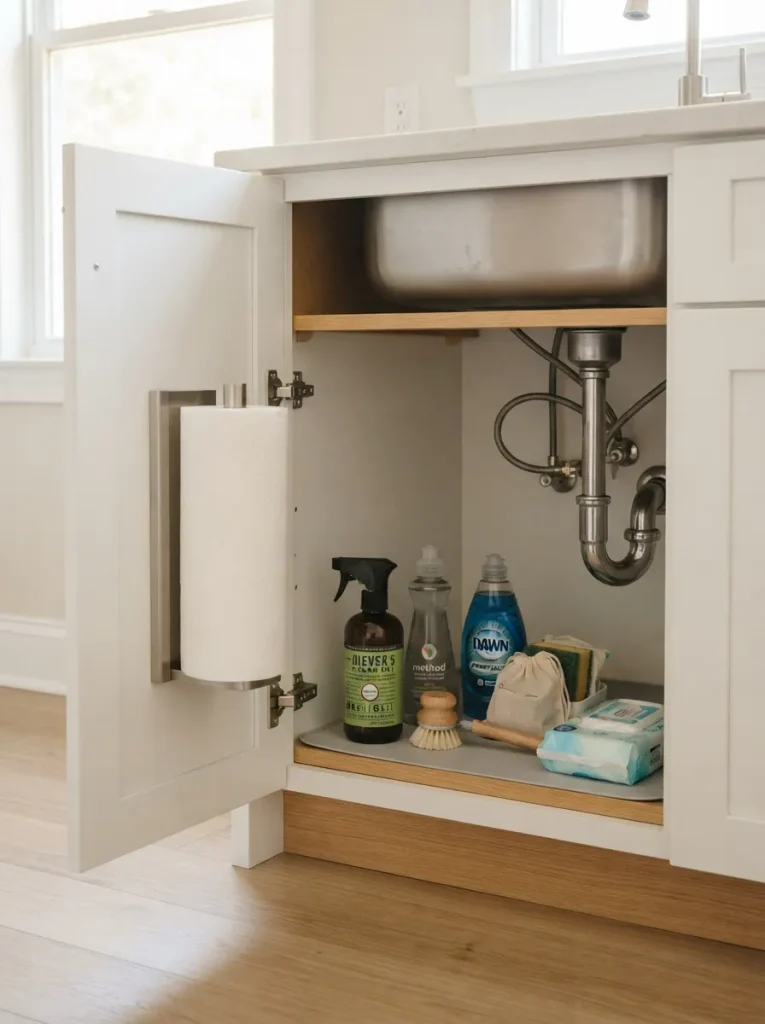
Side-Mounted Paper Holder
Quick Tip:
Measure the cabinet door and nearby plumbing before installing a paper towel holder. Choose a compact design that keeps the roll away from leaks and allows enough clearance for the door to close fully. A removable adhesive version can be useful for renters or temporary setups.
A side-mounted paper towel holder keeps the roll off the counter while using otherwise wasted cabinet space. Position it near the front edge for quick access during spills and cleaning. Keep extra rolls elsewhere if the cabinet is narrow, since storing too much around the holder can make the area difficult to use.
Leak-Proof Trays
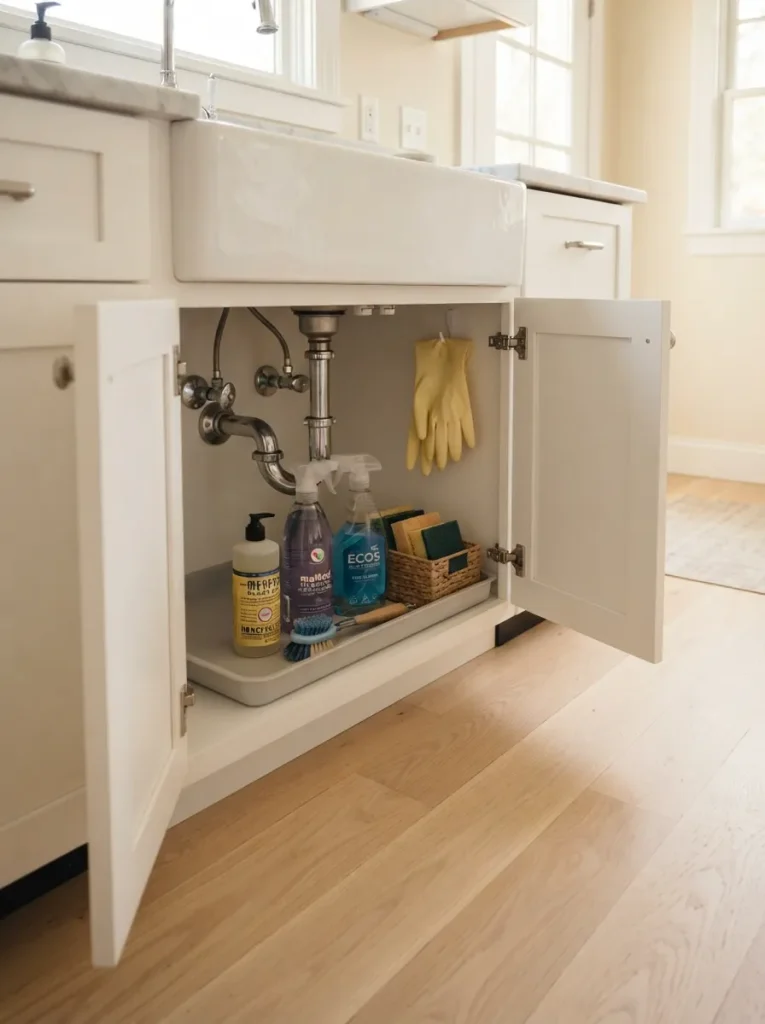
Cost: Low | Time: 10 minutes | Skill Level: Beginner | Best For: Protecting cabinet floors
A waterproof tray creates a contained area for bottles that might drip or spill. Choose a raised-edge design that fits beneath the plumbing without blocking access. Keep frequently used liquids inside the tray and wipe it regularly so small leaks do not become hidden cabinet damage.
Pipe-Around Storage
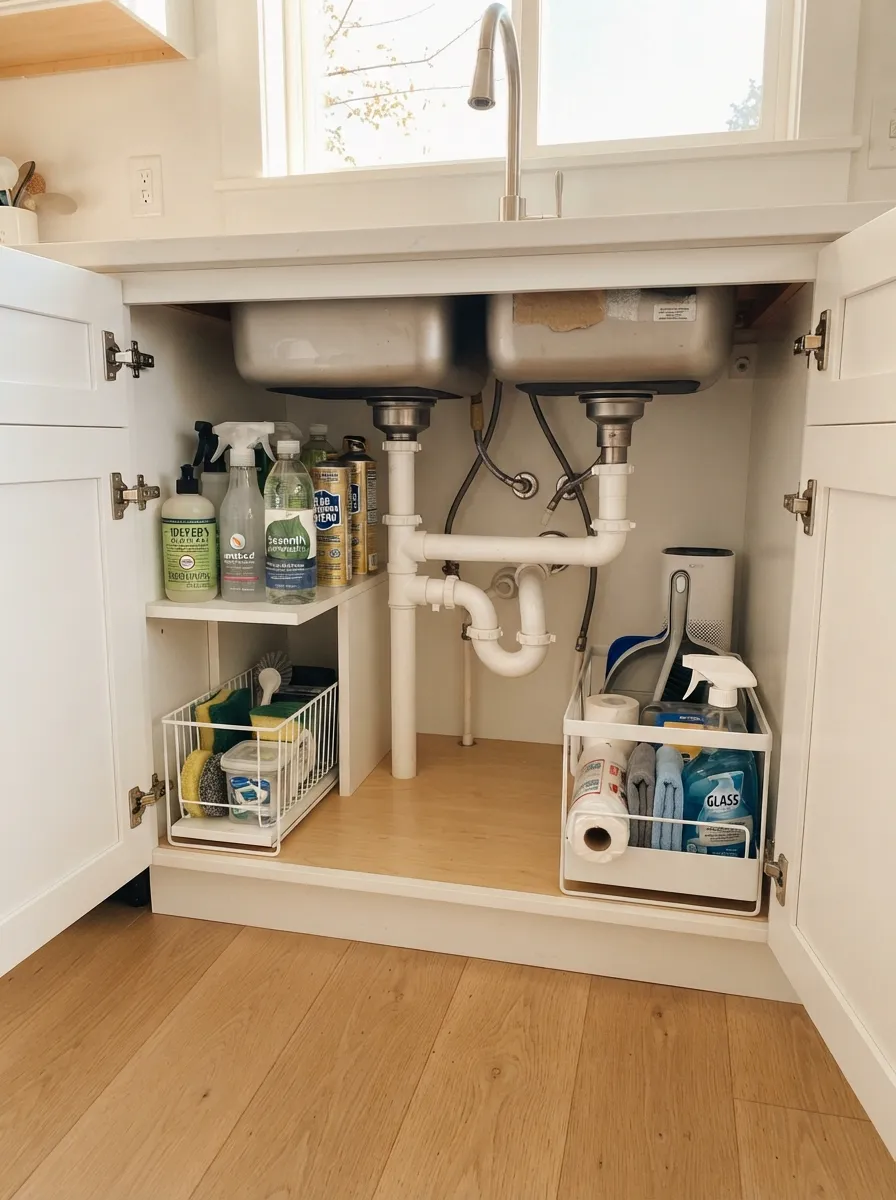
Plumbing does not have to leave the cabinet feeling unusable. Measure the open areas beside and behind the pipes, then choose narrow containers that fit those spaces. Keep shutoff valves visible and leave enough room to reach them without removing several storage pieces.
Two slim bins can often work better than one large container because they adapt around awkward plumbing. Store sponges and cloths on one side and cleaning refills on the other. I’ve noticed that working around the pipes instead of trying to hide them makes the entire cabinet easier to maintain.
Cleaning Supply Zones
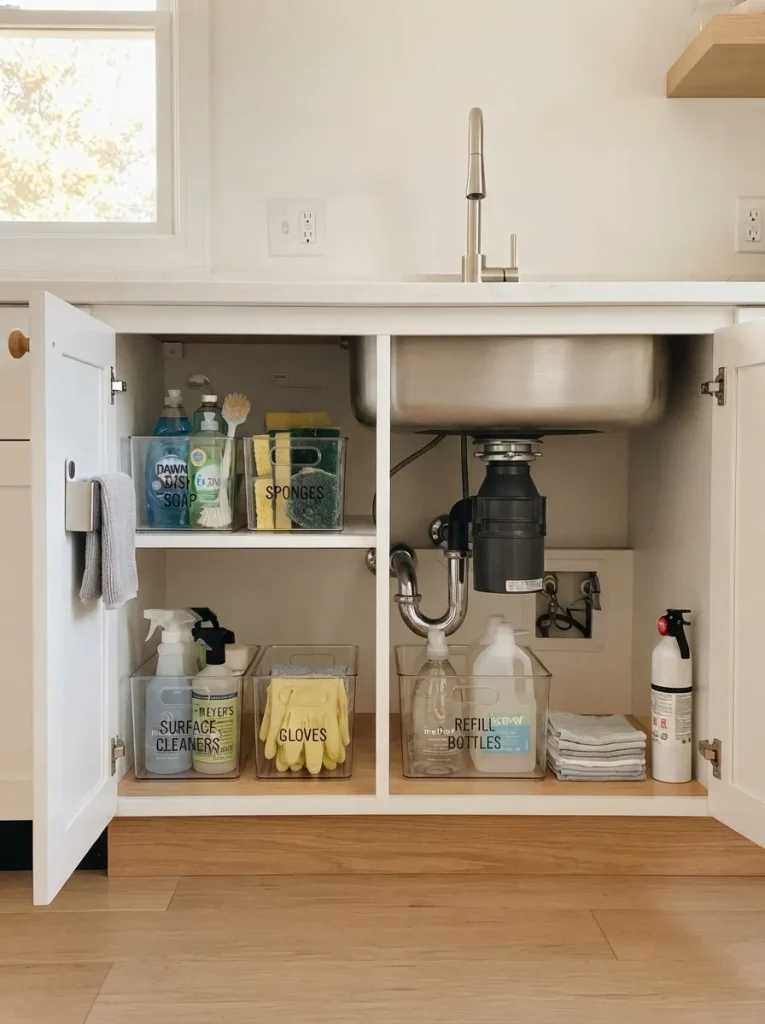
- Daily Zone: Keep dish soap, sponges and frequently used brushes at the front.
- Cleaning Zone: Group surface sprays, gloves and scrubbers together.
- Backup Zone: Store refill bottles and extra supplies farther back.
- Tool Zone: Keep brushes, cloths and small cleaning tools in one container.
- Safety Zone: Place stronger cleaning products securely and away from children.
Clear zones prevent the cabinet from becoming a pile of unrelated supplies. Give every category a specific location and return products there after use. Keeping daily items closest to the opening saves time, while backup products can occupy deeper spaces that are less convenient to reach.
Sliding Storage Trays
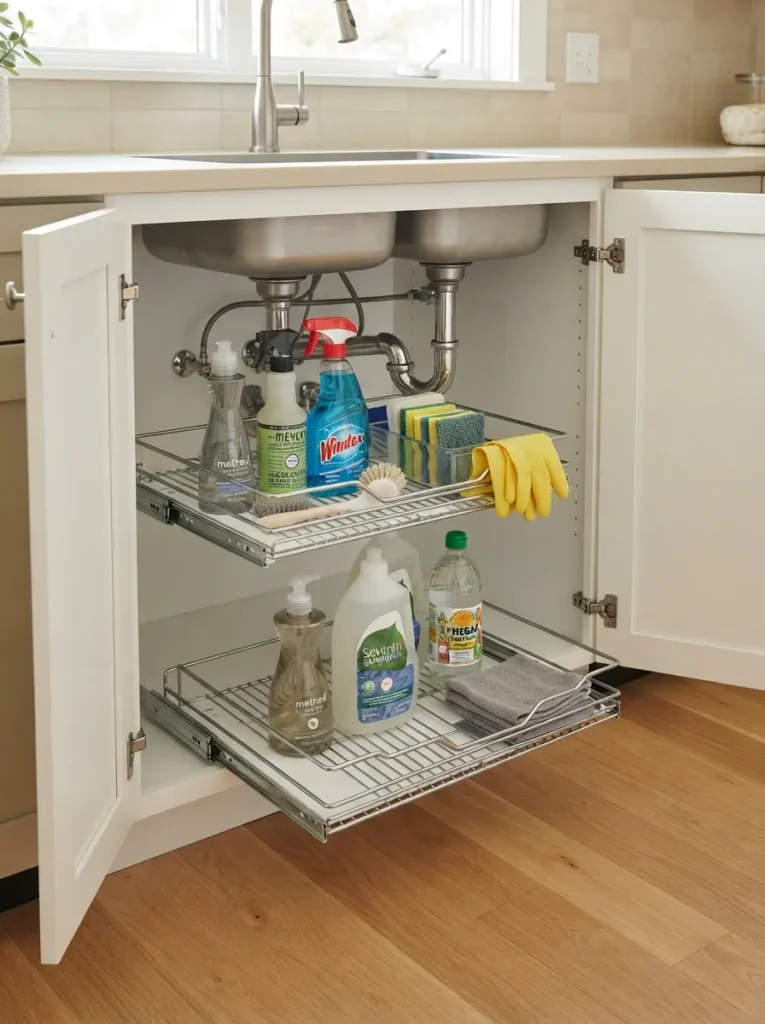
Cost: Moderate | Time: 30 to 60 minutes | Skill Level: Beginner | Best For: Deep cabinets
Sliding trays make deep cabinet storage much easier to reach because supplies come forward instead of getting lost at the back. Choose trays that match the cabinet width and leave clearance around plumbing. Keep heavier bottles on the lower tray and lighter accessories above.
Hanging Glove Rack
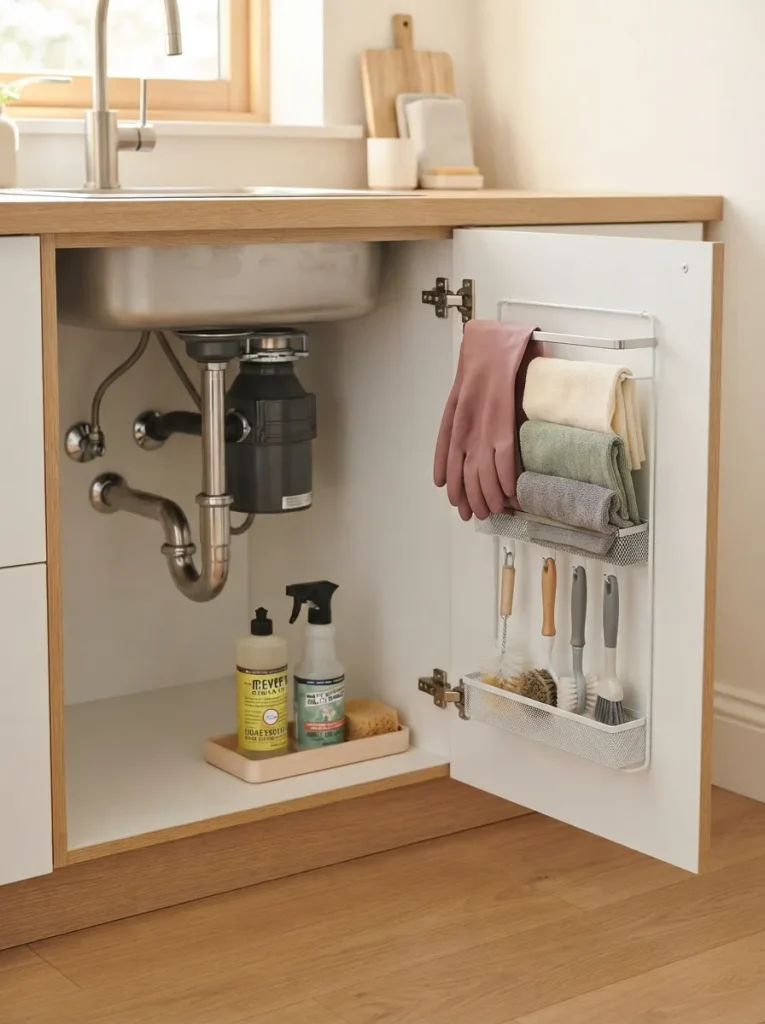
A small rack gives reusable gloves a dedicated place to dry between cleaning sessions. Mount it inside the cabinet door or along a clear side panel where moisture can escape. Keep gloves separated instead of folding them into a pile, which helps them dry faster and makes the next cleaning task easier.
Reserve the rack for lightweight items so the cabinet door stays balanced. A few hooks can also hold microfiber cloths or small brushes, provided they are allowed to dry first. This setup keeps damp cleaning tools away from stored paper products and makes the cabinet feel less crowded.
Narrow Bottle Bins
DO:
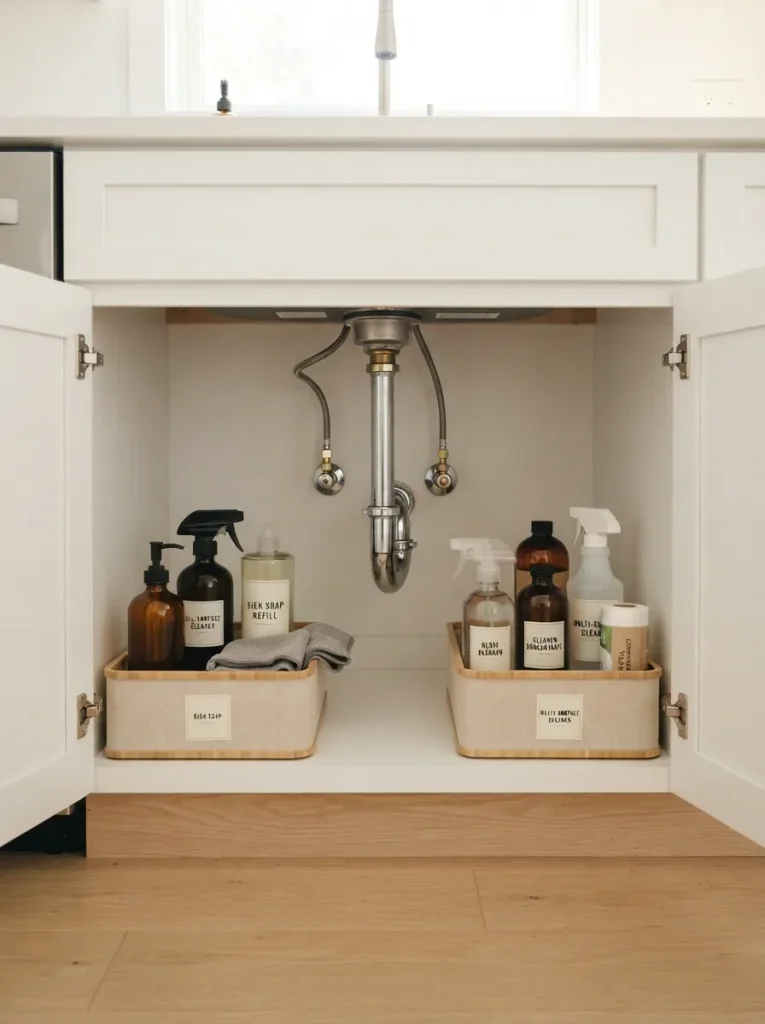
- Measure narrow spaces beside the plumbing before choosing bins.
- Keep bottles upright and grouped by cleaning task.
- Choose bins with handles for easy removal.
- Leave room around pipes and shutoff valves.
DON’T:
- Force oversized containers into narrow gaps.
- Hide leaking bottles inside closed bins.
- Block access to plumbing connections.
- Mix unrelated supplies in every container.
Narrow bins turn the unused spaces beside sink pipes into practical storage zones. Assign each bin a category so products remain easy to locate. Handles make cleaning day simpler because you can lift an entire group out at once. This approach works especially well in cabinets where one large organizer will not fit.
Stacked Drawer Bins
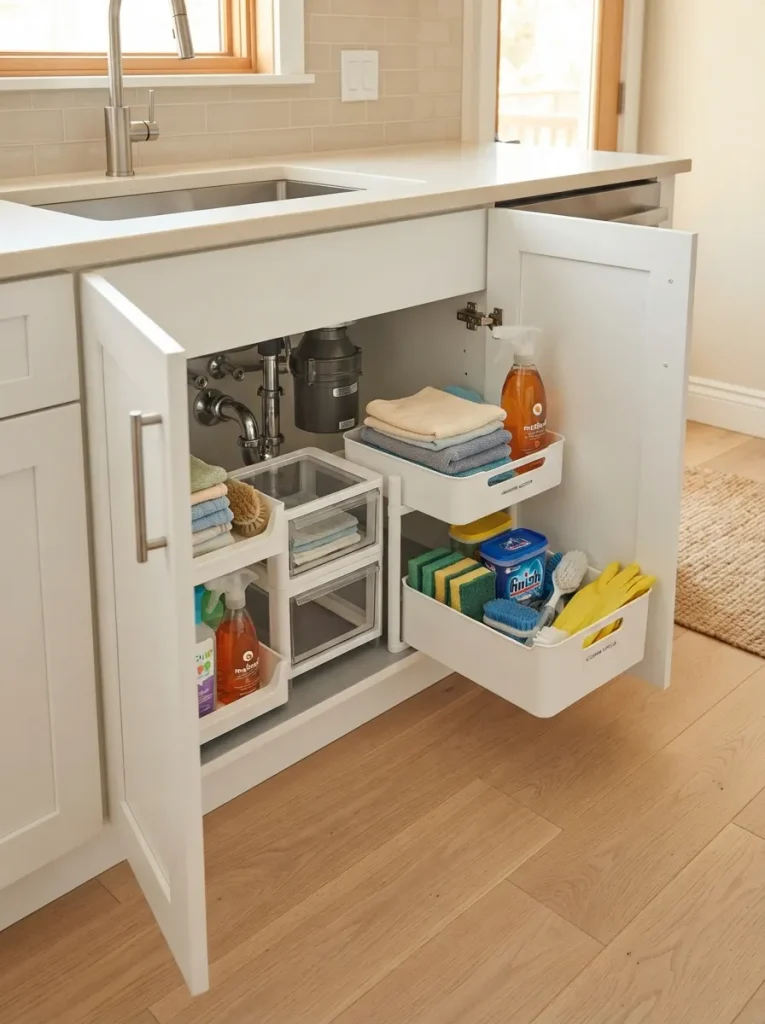
Cost: Moderate | Time: 30 minutes | Skill Level: Beginner | Best For: Small cabinets with limited floor space
Stacked drawer bins create separate storage levels without requiring a full cabinet renovation. Keep small daily supplies in the upper drawer and heavier or less-used products below. Choose drawers that slide smoothly and leave enough space around plumbing so you can still reach valves and connections.
Removable Wire Baskets
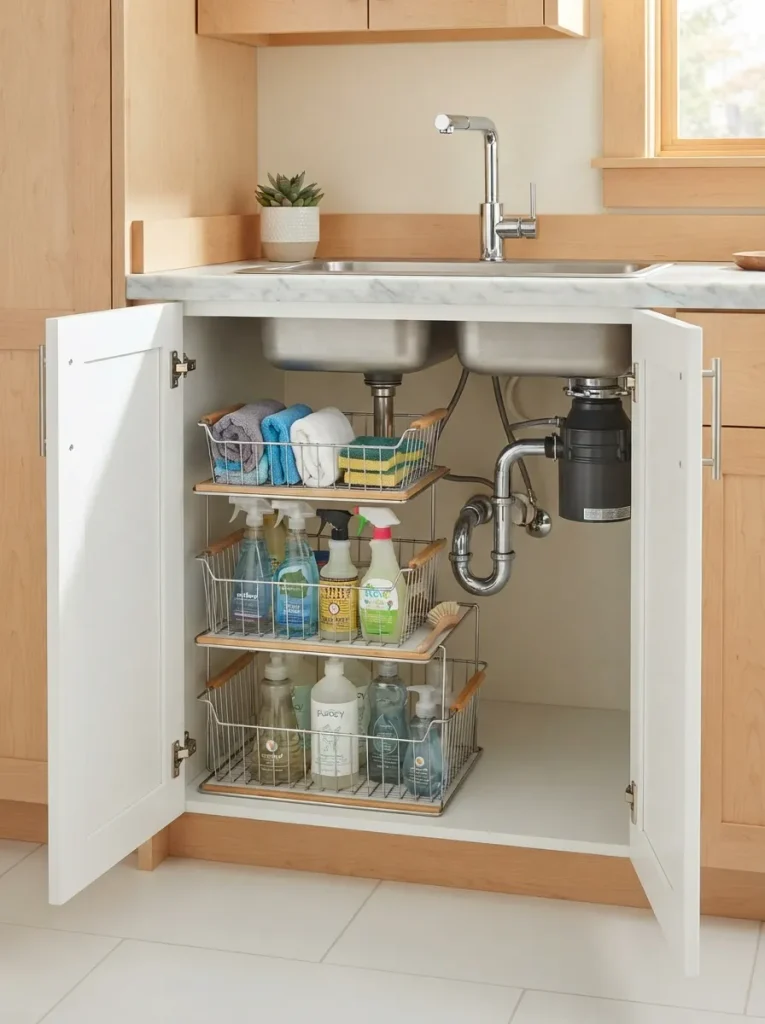
Wire baskets make scattered supplies easier to group while keeping the cabinet interior visible. Choose removable baskets with handles so you can lift them out when cleaning or checking supplies. Use one basket for cloths and sponges, another for bottles and keep the categories consistent.
Open wire sides allow air to circulate around damp cleaning tools and make it easier to spot missing supplies. Avoid placing tiny loose items directly inside large baskets because they can become difficult to find. Small containers inside the baskets create useful subdivisions without taking away flexibility.
Back-of-Cabinet Hooks
Quick Tip:
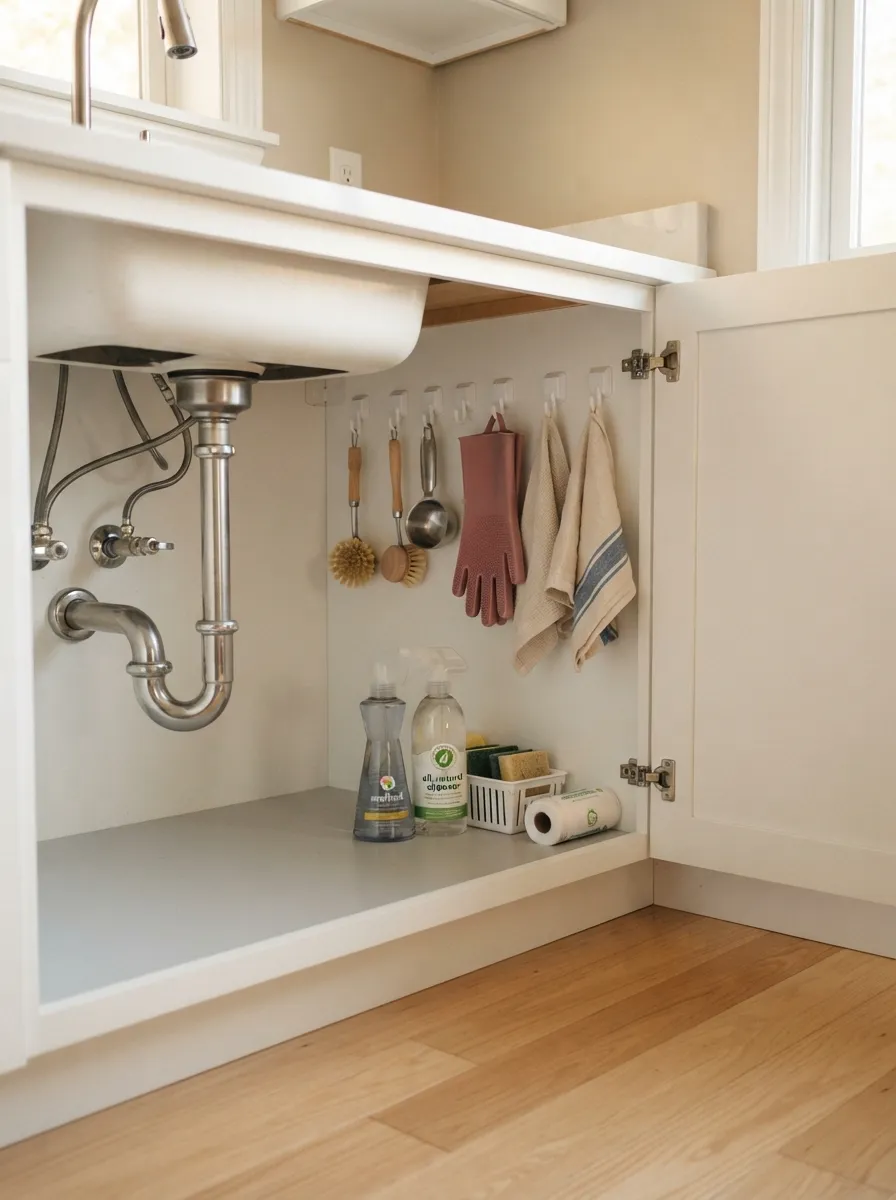
Use the back wall for lightweight tools that would otherwise take up floor space. Before installing hooks, check the cabinet construction and avoid areas containing plumbing or electrical components. Keep enough distance between hooks so brushes and cloths can hang without overlapping.
Rear hooks make use of cabinet space that is often completely overlooked. Hang brushes, gloves or small cleaning accessories where they remain visible but stay out of the way of larger bottles. I’ve noticed that vertical hanging storage works particularly well when the cabinet floor is already crowded with containers.
Slim Side Bins
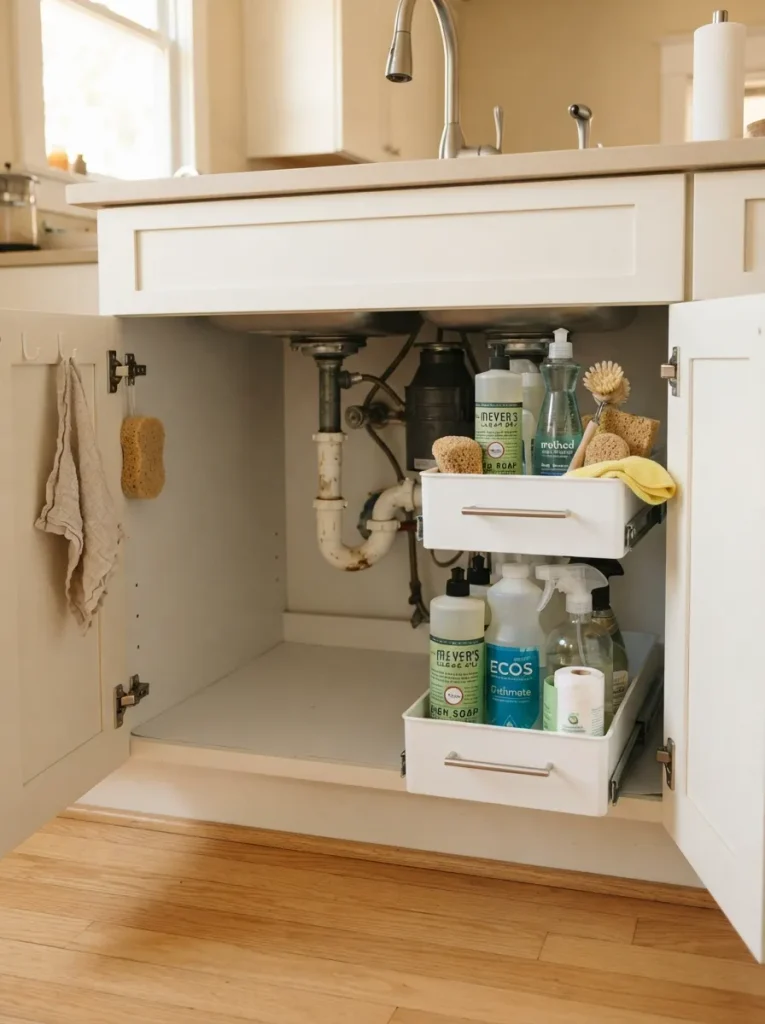
Cost: Low to moderate | Time: 15 minutes | Skill Level: Beginner | Best For: Narrow cabinet gaps
Slim bins make use of the narrow spaces that often remain beside sink pipes. Choose containers that are tall enough for bottles but narrow enough to leave plumbing accessible. Keep one bin for dishwashing supplies and another for cleaning tools so each category stays easy to reach.
Hanging Rail Hooks
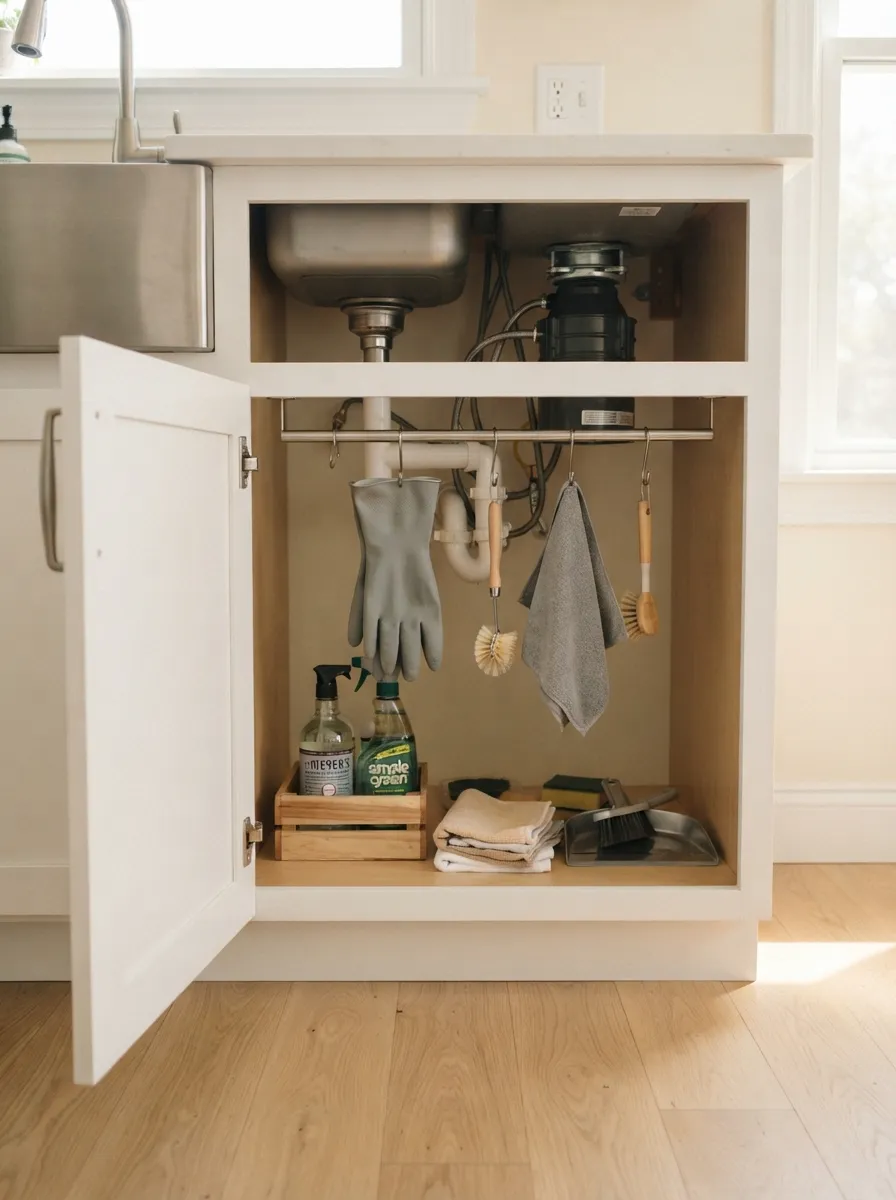
A short rail with hooks creates flexible hanging storage along the cabinet wall. Use it for lightweight gloves, brushes, cloths or small cleaning tools rather than bulky bottles. Position the rail where it will not interfere with plumbing, hinges or the cabinet door.
Leave enough space between hooks for damp items to dry properly. Keep heavier supplies on the cabinet floor or inside bins to prevent unnecessary strain on the rail. A removable rail can also make seasonal reorganizing easier when your cleaning routine changes.
Removable Cleaning Caddy
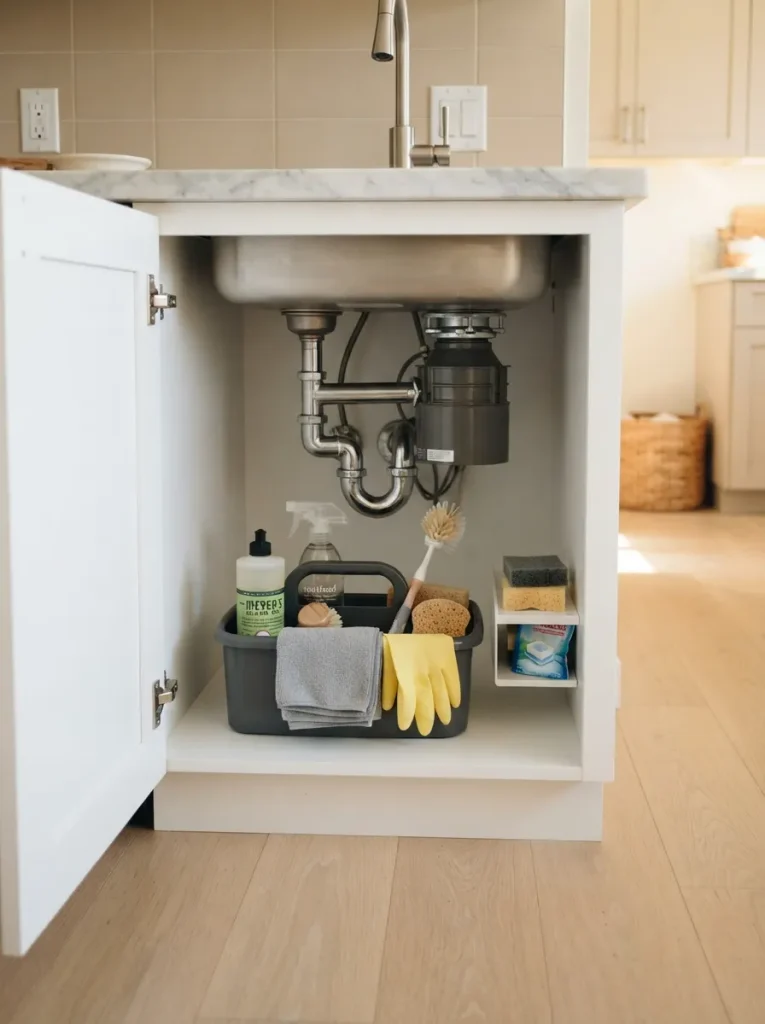
- Choose a handled caddy that fits comfortably around the cabinet plumbing.
- Group frequently used cleaning products together for quick carrying.
- Keep bottles upright to reduce the chance of spills.
- Select a washable material that handles moisture well.
- Leave enough open space around the caddy for easy removal.
A removable caddy keeps your main cleaning supplies together instead of scattered throughout the cabinet. Carry the entire group to another area when cleaning, then return it to its designated spot afterward. This simple system saves searching time and makes keeping the cabinet organized much easier.
CONCLUSION
A dorm room becomes more enjoyable when it reflects your personality while still working for everyday college life. Simple choices such as comfortable bedding organized storage, personal wall displays, useful lighting and dedicated spaces for studying or relaxing can make a basic room feel much more welcoming.
The best Dorm Decorating Ideas for Guys are practical enough for busy student life and personal enough to make the room feel like your own. I’ve seen how small changes can completely shift the way a space feels and functions.
Start with one or two ideas that fit your room and build from there. Save this article on Pinterest, try your favorite ideas and share it with someone who needs fresh dorm inspiration. A comfortable room can make everyday college life feel a little better.